ProSeries Basic Intuit Hosting onboarding and setup guide
by Intuit•1• Updated 3 months ago
It's important to note that this article applies to ProSeries Basic only, and not ProSeries Professional. If you will be using both in the hosted environment, follow the automation steps in the ProSeries Professional guide, before moving your ProSeries Basic files using the steps in this article.
Additional guides are available for setting up some additional products in the hosted environment:
- ProSeries Professional
- Document Management System (DMS)
- Microsoft Office
- EasyAcct Professional and Information Return System (IRS)
- SmartVault
Scheduling your onboarding appointment
When you purchase Intuit Hosting online, your Order Summary will have a Schedule appointment button. This will allow you to select a date and time that works best for you to have one of our onboarding experts help you move your ProSeries information into Rightworks.
When you purchase through sales, they'll assist you with scheduling your onboarding appointment.
If you have an appointment scheduled, see Steps to complete before your Intuit Hosting onboarding appointment.
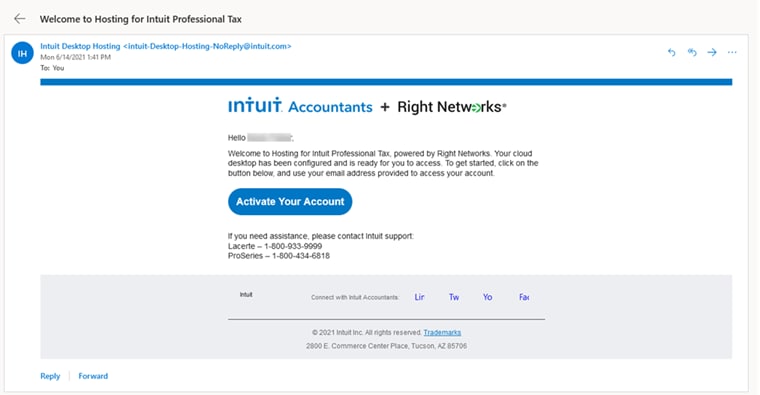
Activating your Rightworks account
- From the welcome email, select Activate Your Account.
- Create your Rightworks password.
- Sign in to the Rightworks AppHub with your email address and your newly created password.
- You will be prompted to enter a phone number, the Area Code in a separate field than the remainder of the Phone Number (without dashes or spaces). Then select Next.
- Enter a 4-digit number of your choice in the Create a Support PIN field. Select Next.
- Answer the question on if you will be using the hosted environment.
- Select the Intuit ProSeries Tax package to assign to yourself, if applicable. Then select Next.
- You will be prompted to install TSPrint and TSScan which are go-betweens for printing and scanning. This can be done at this time or skipped for now if needed. Select Next when ready.
- You will be prompted to agree to terms to finish setting up your login.
Setting up access from your computer
For instructions on setting up access from a Mac, see this article.
Select the Setup Your Computer link on the upper right of your Rightworks AppHub My Apps screen, then select the Download PC Wizard button in the pop-up to download the wizard.
The wizard can be run on multiple computers and set to use the same login. Only one computer can access the hosted environment at the same time with the same login. For example if you leave your home computer signed in to the hosted environment and go to your office and use it to access hosted, the home computer will be kicked off.
- Run the downloaded RightNetworksSetupWizard.exe.
- Select Just set up your computer.
- Enter the email address that is your Rightworks username and the password you created.
- If you receive an error about not having permission to sign in or an "object reference not set to an instance of an object" error message, check the Rightworks AppHub and make sure you have an Intuit ProSeries Tax package assigned to the email address being used.
- The wizard will then install TSPrint and TSScan (used for printing and scanning). When you receive the Installation Successful! message, select Next.
- Windows may ask if you want to allow the wizard to make changes at this point and later while running this wizard, select Yes if prompted.
- The wizard will then add a Rightworks shortcut to your desktop and a shortcut to the Rightworks AppHub. You may uncheck the Add AppHub Shortcut checkbox, if desired. Select Next.
- When you see the You're Done! message from the Setup Wizard, select Finish to close it.
In rare cases, you may not be able to run the setup wizard. Usually this is due to local system configuration.
Installing Apps
The 7 most recent years of ProSeries, multiple years of Fixed Asset Manager, and the current version of ProSeries Document Management System are available to install when a ProSeries package is assigned to a user.
- Sign in to the Rightworks AppHub.
- Select My Apps in the left column.
- Go to the Cloud Apps tab.
- Additional apps are available on the Manual Install Apps tab that can take up to 3 business days before becoming available (the Rightworks Provisioning Team may email asking for additional information needed).
- In the Available Applications section, choose Install for all desired programs.
- Once an app has been installed, you'll see it in the Installed Applications section.
Moving your ProSeries Basic files
You can install 7 years of the tax program in the hosted environment. When a new year of the tax program gets released, the older program exceeding 7 years gets uninstalled. When this happens, any data would remain and could be downloaded if needed to restore locally.
This article uses YY to reference the tax year in 20YY format.
- On your desktop computer, browse to C:\BasWinYY.
- Copy the YYData folder.
- In the hosted environment, browse to I:\ProSeries20YY\ProBasYY.
- Paste the YYData folder.
- You can use Ctrl+V or select the Home tab in File Explorer and use the Paste button.
- Answer yes when you're asked if you want to merge the data folder with the existing one.
- Minimize the hosted environment, and copy the Common folder.
- This will also be located in C:\BasWinYY and includes your options.
- In the hosted environment, browse to H:\BasWinYY.
- Paste the Common folder.
- Answer yes when you're asked if you want to merge the common folder with the existing one.
- Answer copy and replace when asked what you want to do with the files where there's already one with the same name.
- Minimize the hosted environment, and copy the inventory.dat file.
- In the hosted environment, browse to H:\BasWinYY.
- Paste the inventory.dat file.
- Answer copy and replace when asked what you want to do with the file since there's already one with the same name that showed just Federal as being installed.
- Open the ProSeries Tools folder and then the ProSeries Basic Edition 20YY Tools folder and run Tools - Repair Updates.
- Repeat for each year of ProSeries Basic you want in the hosted environment.
Completing your program setup
When you open ProSeries Basic, if your clients do not show in your HomeBase, select HomeBase Maintenance from the HomeBase menu and select Fix It. Once it's checked as as fixed, select Close.
You can still open clients from the File menu by going to Open Client and browsing to I:\ProSeries20YY\ProBasYY\YYData. Saving a client will usually add them to your HomeBase view in these older years (and in newer years if they did not automatically get added).
Installing additional states
In the hosted environment, Federal get installed to start. ProSeries is slow when everything is installed, so you'll want to install only what you need for your client files.
- Open ProSeries.
- From the Update menu, choose Select and Download New Products.
- Check the needed State Products.
- Click Next.
- Click Install Now when the Ready to Install screen appears.
- It is recommended to run the Repair Updates Tool from the ProSeries Tools folder on the Hosted Desktop for each year ofProSeries Basicafter selecting the States. This will ensure all states are properly installed.
Licensing ProSeries
You may be automatically prompted to license ProSeries.
To manually license ProSeries:
From the Tools menu, select License Products.
Updating your e-file acknowledgements
When you move your files over, e-file acknowledgements may need to be redownloaded.
This option is available for the current tax year, and the two prior tax years, while the IRS Modernized e-File Status (MeF) is open.
- Go to the EF Center HomeBase view.
- Select the returns.
- From the E-file menu, select Electronic Filing.
- Select Update Acknowledgement Status of Selected Returns/Extensions/Payments.
- Choose to update Only the selected return.
- Select OK to retrieve the latest available status.
ProSeries Fixed Asset Manager (FAM)
Locating and zipping your FAM clients:
- On your desktop computer, browse to your Clients folder and confirm there are files inside.
- When saved on the C:\ drive this is normally C:\FamWinYY\Clients.
- To locate the FAM clients when they aren't in the above location:
- Open Fixed Asset Manager.
- From the Tools menu select Program Options.
- Select the Clients tab.
- Under File Locations make note of the Default Client Location.
- Browse to this location and confirm there are files inside.
- Right-click on the Clients folder.
- Go to Send To and choose Compressed (zipped) folder.
- If you are planning on uploading multiple years of FAM, rename the zip to YYFAM indicating the year.
Unzipping and putting FAM clients in place:
- Open the Rightworks remote desktop using the hosted environment shortcut.

- Open File Explorer and browse to your I:\ drive.
- Highlight an uploaded zipped folder.
- Select the Compressed Folder Tools Extract tab that appears.
- Click on the Extract all button.
- The Files will be extracted to this folder field will default to the I:\ drive in a folder that would be created using the same name as the zip. Click Extract.
- Repeat the extraction process for each year's FAM clients that were uploaded.
- Browse to the extracted Clients folder and open it.
- Select all.
- You can use Ctrl+A (keyboard shortcuts work by default in the hosted environment when it's maximized) or select the Home tab in File Explorer and use the Select all button.
- Copy.
- You can use Ctrl+C or select the Home tab in File Explorer and use the Copy button.
- Browse to I:\FamWinYY\Clients.
- Paste the contents of the Clients folder.
- You can use Ctrl+V or select the Home tab in File Explorer and use the Paste button.
