Using the input drawer to import data and more into a tax return in ProConnect Tax
by Intuit•19• Updated 1 month ago
Maximize efficiency by using the input drawer to review flagged items, import documents, view or edit the organizer, and track your clients' Intuit Link activity — all without leaving the tax return.
- See here to learn more about Intuit Link
Table of contents:
How to import data:
- Go to the Input Return workspace.
- Select the
 icon on the right side of your screen to open the data import panel.
 - If the documents you want to import aren't already listed, select Browse to choose files from your computer.
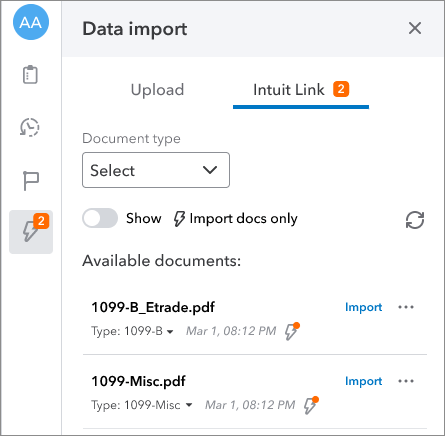
- If your client has already accepted an Intuit Link invitation this year, you can switch between Upload and Intuit Link.
- The Uploads list will show documents added by your firm, and the Intuit Link list will display documents your client uploaded.
- Under the Uploads tab, you will be presented with two means of importing documents:
- Drag-and-drop browsing from your local device
- Using a cloud-based service:
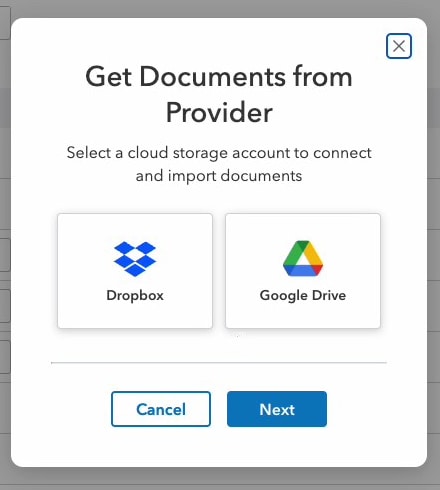
- In a secured pop-up, you will be asked to sign in to your Google or Dropbox account and grant the program access for the import task.
- The program will process the uploads and determine which documents can be imported.
- You can upload up to 20 documents at a time using Dropbox or Google Drive.
- Locate the document and select Import.
- A document viewer will appear where you can review the source document and the information to be imported.
- If you've already entered information for this document type in the return, you'll be asked whether you wish to replace the existing input or create a new record.
- Once you're satisfied, select Import.

What can I do from the drawer?
The import drawer now includes:
- File upload options
- CVS/Excel imports
- Option to initiate a Link request,
- The ability to retrieve IRS transcripts
Additionally, the document list will continue to show any shared documents uploaded by the firm or client, but will now also include non-shared documents uploaded by the firm. This allows you to access more data from within the return than ever before.
The traditional organizer view is still available for reviewing responses provided through Link to the questionnaire or the document requests. All documents the client provides through Link are also still available on the document list view for easy review and import.

How many documents can I import?
From the document list, you can import up to 10 documents at a time in a single workflow. This is only accessible from the document list, and is not available on the organizer panel.
For returns other than 1040, you can now upload and view documents from the drawer while in the return. We've also made CSV/Excel imports available from the import hub panel for business returns in addition to the existing option under the Import Data dropdown.
Right now, all of the previous entry points for importing data is still available.
What can I upload?
Individual
- W2
- 1098
- 1099-INT
- 1099-DIV
- 1099-MISC
- 1098-T
- 1099-R
- 1099-B
- 1099-G
- 1099-NEC
- Prior year 1040
All others
- Upload documents from local machine
- Upload documents from Google Drive or Dropbox
- Depreciation, Partners, Beneficiaries, Shareholders import, as applicable (CSV)
- Send or open a Link request
- Retrieve IRS transcripts
- For information on importing other types of data, like stock transactions, depreciation, or K-1s, see Importing data.
How can I upload?
- Drag and drop document into Import Hub
- Upload documents from local machine
- Upload documents from Google Drive or Dropbox
- Import from a 1040 (either prior year or current year), will overwrite existing data
- Prior year will populate client info and summary data
- Current year will populate client info only
- K-1 import (from a business return)
- Schedule D import (CSV)
- Depreciation import (CSV)
- Send or open a Link request
- Retrieve IRS transcripts
- All others
- Upload documents from local machine
- Upload documents from Google Drive or Dropbox
- Depreciation, Partners, Beneficiaries, Shareholders import, as applicable (CSV)
- Send or open a Link request
- Retrieve IRS transcripts
- For information on importing other types of data, like stock transactions, depreciation, or K-1s, see Importing data in ProConnect.
- How many documents can I import?
- From the document list, you can import up to 10 documents at a time in a single workflow. This is only accessible from the document list, and is not available on the organizer panel.
- For returns other than 1040, you can now upload and view documents from the drawer while in the return. We've also made CSV/Excel imports available from the import hub panel for business returns in addition to the existing option under the Import Data dropdown.
- Right now, all of the previous entry points for importing data is still available.
For information on importing other types of data, like stock transactions, depreciation, or K-1s, see Importing data.
After importing:
- Input fields completed by data import will be highlighted in green so you can identify them.
- A lightning bolt will appear next to the document in the data import panel, indicating that the import is complete.
Bulk importing data
- Select Data import using the icon: on the right panel while in a tax return.
- You can choose up to 10 importable documents and select Import from the menu that appears when multiple items are selected.
- Review each selected document as a single workflow. Each document will have a side by side comparison and the ability to update fields.
- If you decide to not import a document while reviewing, you can skip over it here.
- A final review of which documents will be imported and which were skipped will be available after reviewing each document.
While in the bulk import flow, you can also click on documents that have already been reviewed in the top progress section to return to that document. On the final review screen, you can return to any of the previous document review screens.
Zoom and highlight on W2 imports
- Select a W2 form to be imported from the document list.
- Select Import to see the W2 on the left and imported numbers on the right.
- Within the All fields/matched fields tab, select any imported value, and it will be highlighted the W2:
Note: You can turn the zoom and highlight feature off with the toggle at the top of the screen.
Removing a document from Bulk import
If you don't want to import a particular document during the review process, select Skip this document and then Next. The document won't be inlcuded in data.
You won't be able to enter the bulk import flow if you select more than 10 documents or if you select documents that aren't supported for import.
All documents will be imported only at the end of the bulk import flow. This means if you leave the flow before completing it entirely, none of the selected documents will be imported.
How to flag items for review:
Flagged items are specific input fields marked as needing review. You can track missing data or estimated amounts by flagging the appropriate input fields.
- Go to the Input Return tab.
- Go to the input field you need to flag.
- Place your mouse over (or click inside of) the field. A flag button will appear to the right.
- Sometimes a more button will appear, which looks like three dots. Select more to see the Flag item option.
- Click the flag button or the Flag item option.
The flagged field will be highlighted in orange on your input screen, and the missing information added to a list of flagged items for the return.
Split or merge documents from the import drawer
- Go to the data import tab on the right side of the screen.
- Select Browse to view your documents.
- Select up to 10 tax forms that you want to Split or Merge before importing.
Split:
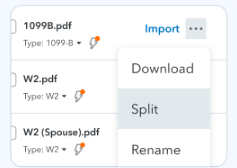
- Select the three dots by any imported document to open the dropdown for more options.
- Here, you'll see an option to Split.
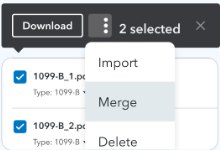
Merge:
- Select the documents you want to combine using the checkboxes by each document
- Select the three dots next to the Download button at the top of the window to open the dropdown for more options.
- Here, you'll see the option to Merge.
To view and resolve previously flagged items:
- Select the flag button to the right, on the edge of your window.
- The button will have an orange badge showing the total number of items currently flagged in the return.
- A flagged items list will appear.
- Select the name of an item to jump to its input in the return, or select Resolve to show it's completed and remove the flag.
- Items can also be resolved on the input screen by simply clicking the flag button again.
