ProConnect HelpIntuit HelpIntuit

Walking through the Setup Assistant in Intuit Practice Management

by Intuit Updated 11 months ago

Intuit Practice Management is now supported by Karbon. For support, see here or reach out to support@karbonhq.com

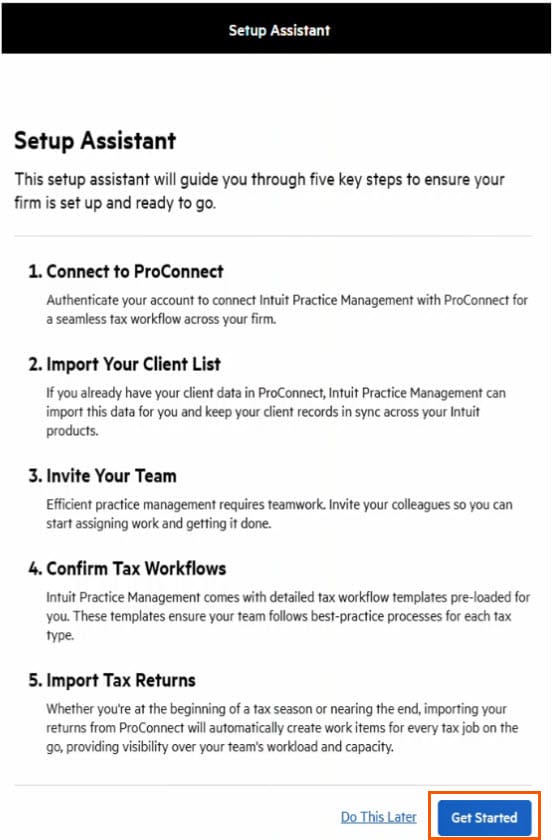
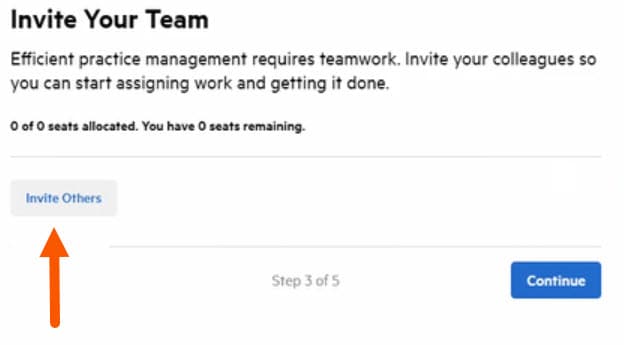
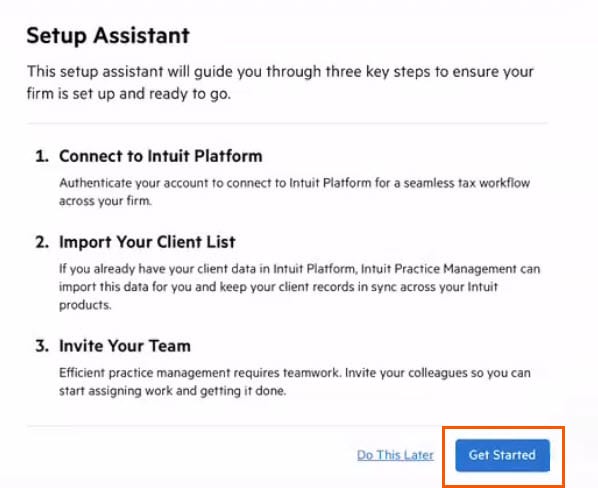
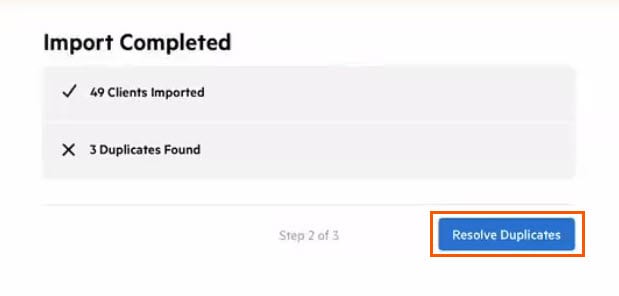
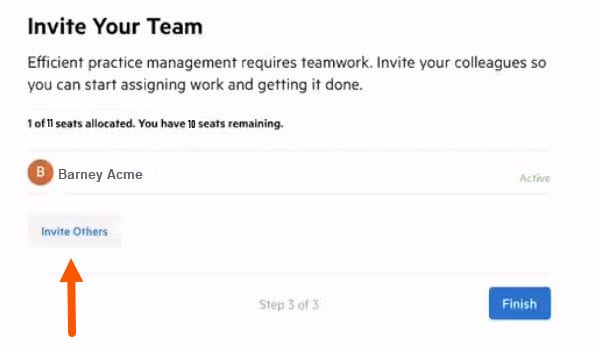
The Setup Assistant in Intuit Practice Management powered by Karbon will guide you through the steps to connect Lacerte, ProConnect Tax or Intuit Platform to sync client data to from Intuit Practice Management.

Complete the following steps before walking through the Setup Assistant for the tax product:

  1.  Prepare your data for your tax product.
  2. Sign in to Intuit Practice Management and make sure that all tax template customizations have been completed and published for the tax branded templates when connecting Lacerte or ProConnect.
    • Focus on the tax template customizations as they are the only work items that will be auto generated during the Setup Assistant.
    • If there are any templates with changes that haven't been published, the work generated will use the last published instance of the template.
  3. Have the Primary Admin’s credentials available for the authentication part of the Setup Assistant.
  1. Select ProConnect or Lacerte in the left hand column.
    • If connecting Lacerte, select Yes, Lacerte is Synced.
    • If for any reason you are not ready to sync select Do This Later to exit the Setup Assistant.
  2. On the Setup Assistant screen, select the Get Started button in the bottom right corner to walk through the steps to get set up.
    Setup Assistant.jpg
  1. On the Connect to screen, select the Authenticate button.
  2. Log in to the Intuit Sign in screen using the Primary Admin credentials used for your tax program. 
  3. Select Connect on the Intuit Accountants screen.
  1. Import your clients from your tax program using the Import Client List button.
    Import-Client-List-05042022.jpg
  2. When the import is completed, if there are duplicates, it will list the number of clients imported as well as the number of clients that have duplicate information. Select Resolve Duplicates button to bring up the list.    
    Import-complete-tax-05042022 x.jpg 
    • The contacts may share the same email address or the same name.
    • If they are the same contact and a new one does not need to be created, select the contact from the list on the right and click the Match button.
    • If the contact is not a match, click the Create New Contact link.
      Resolve-duplicates-tax-05042022.jpg
    • All duplicates must be resolved before you will be allowed to proceed.
  3. If there are no duplicates you will see an Import Completed screen with the number of contacts and a Continue button.

Invite your colleagues in to the program by clicking the Invite Others button. Enter the information requested. This article User Permissions will help you decide what permissions to assign to each individual. These can be updated in Settings if changes need to be made later.
Invite-team-tax-05042022jpg

  • If there are no additional users or you want to skip this step, select Continue.
  • If you do not invite additional colleagues, you will not be able to make changes to work assignees in the next step.

For each of the tax types, select an individual to be assigned to work items that will be generated.

  • The assignee defaults to the Primary Admin completing the sync process. If additional colleagues were invited, click on the X next to the name and begin typing in a colleague’s name to make changes.
  • Only one individual can be assigned to each separate return type.
  • None of the tax types can be left blank. Even if you do not complete a particular type of return, there must be a name assigned to it.
  • Any colleague that was invited in the previous step is an option. The invitation does not need to have been accepted in order to be able to assign work.
  • Once you are in Intuit Practice Management, you will be able to reassign work items individually or you can request a bulk update to reassign multiple items to multiple colleagues.
  • When all Default Work Assignees are selected, select Continue.

Before importing the returns, match your existing tax statuses from your tax program on the left to one of the 5 statuses available in the drop down menu on the right.

  • There may not be an exact match but pick the one that is closest. Additional statuses can be created in Settings and applied once you are in Intuit Practice Management.
  • It’s recommended you review all the items at least twice to ensure none were missed or the wrong status selected.
  • If an incorrect Practice Management Work Status is selected here, the work items will need to be individually updated within the program or a bulk work request can be completed to update multiple items at a time.
  • Leave the default Tax Year selected.
  • Click Import Tax Returns.
  • When completed, it will display the number of returns imported. Select the Finish button.

Complete the following steps before walking through the Setup Assistant for Intuit Platform:

If Connecting QuickBooks Online Accountant:

  1. Mark the clients you no longer need Inactive.
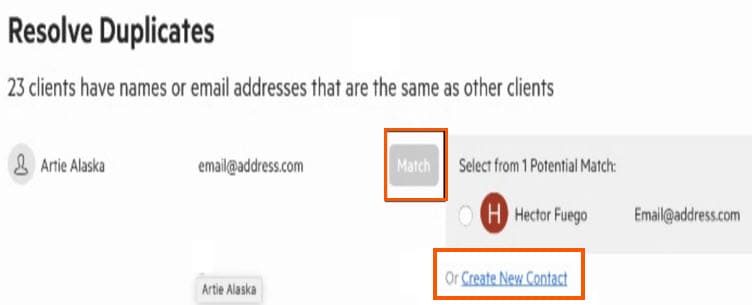
  2. Merge any duplicate clients.
  3. Remove the Company name from any individual clients in QuickBooks Online Accountant. Individual clients with a company name will sync to Intuit Practice Management as an Organizations contact and can't be changed later. To see if any individual clients have a Company name:
    1. Select Sales>Customer
    2. Select the Export to Excel icon excel-to-export-04282022.jpg in the upper right of your Sales customer list to export your customers to excel.
    3. Open the customer excel file and look in the Company column to see if there are any names appearing for Individual clients, if there are, remove the Company name. 
      customer-excel-file-04282022.jpg
  4. Know who the Primary Admin is as their login credentials must be used to complete the authentication part of the process. To find the Primary Admin, log in with a user with that has full access to QuickBooks Online Accountant, click on Team, and look for the Primary Admin.
  1. Select Intuit Platform in the left hand column.
  2. On the Setup Assistant screen, click on the Get Started button in the bottom right corner to walk through the steps to get setup.
    Get-Started-IP-04282022.jpg
  1. On the Connect to screen, select the Authenticate button.
  2. Log in to the Intuit Sign in screen using the Primary Admin credentials used for your tax program. 
  3. Select Connect on the Intuit Accountants screen.
  1. Import your clients from your QuickBooks Online program using the Import Client List button.
    Import-Client-List-04282022t.jpg
  2. When the import is completed, if there are duplicates, it will list the number of clients imported as well as the number of clients that have duplicate information. Select Resolve Duplicates button to bring up the list. 
    Resolve-Duplicates-04282022.jpg
    • The contacts may share the same email address or the same name.
    • If they are the same contact and a new one does not need to be created, select the contact from the list on the right and select the Match button.
    • If the contact is not a match, select the Create New Contact link.
    • All duplicates must be resolved before you will be allowed to proceed.
  3. If there are no duplicates you will see an Import Completed screen with the number of contacts and a Continue button.

Invite your colleagues in to the program by clicking the Invite Others button. Enter the information requested. This article User Permissions will help you decide what permissions to assign to each individual. These can be updated in Settings if changes need to be made later.
Invite-your-team-04282022.jpg
If there are no additional users or you want to skip this step and invite colleagues later, select Finish.

Lacerte TaxProConnect TaxQuickBooks Online AccountantWorkflow Add-On Practice Management

Sign in now for personalized help

Ask questions, get answers, and join our large community of Intuit Accountants users.

More like this

Dynamic AdsDynamic Ads