How to use Intuit Sign for ProSeries for Tax Year 2025 (Pre-Release)
by Intuit•1• Updated 4 days ago
Intuit Sign is fully integrated within ProSeries, making it easier to securely request and track signatures without leaving your workflow. This experience applies new customers who opted into Intuit Sign in TY25. Check out the following video guides:
Request Signature
Dashboard
Client Experience
Tip: You can share this How to review and sign your documents using Intuit Sign in ProSeries article with clients who need help using Intuit Sign.
Table of contents:
Accessing the Intuit Sign dashboard
Manage all of your Intuit Sign requests from the dashboard:
Option 1:
Go to the Intuit Sign menu and select Intuit Sign Dashboard.
Option 2:
Select the Dashboard button at the top of your screen.
You can buy additional Intuit Sign bundles directly in ProSeries.

Intuit Sign Pre-release Enrollment
Follow these steps to enroll your firm in the Intuit Sign pre-release program.
Enrollment Process:
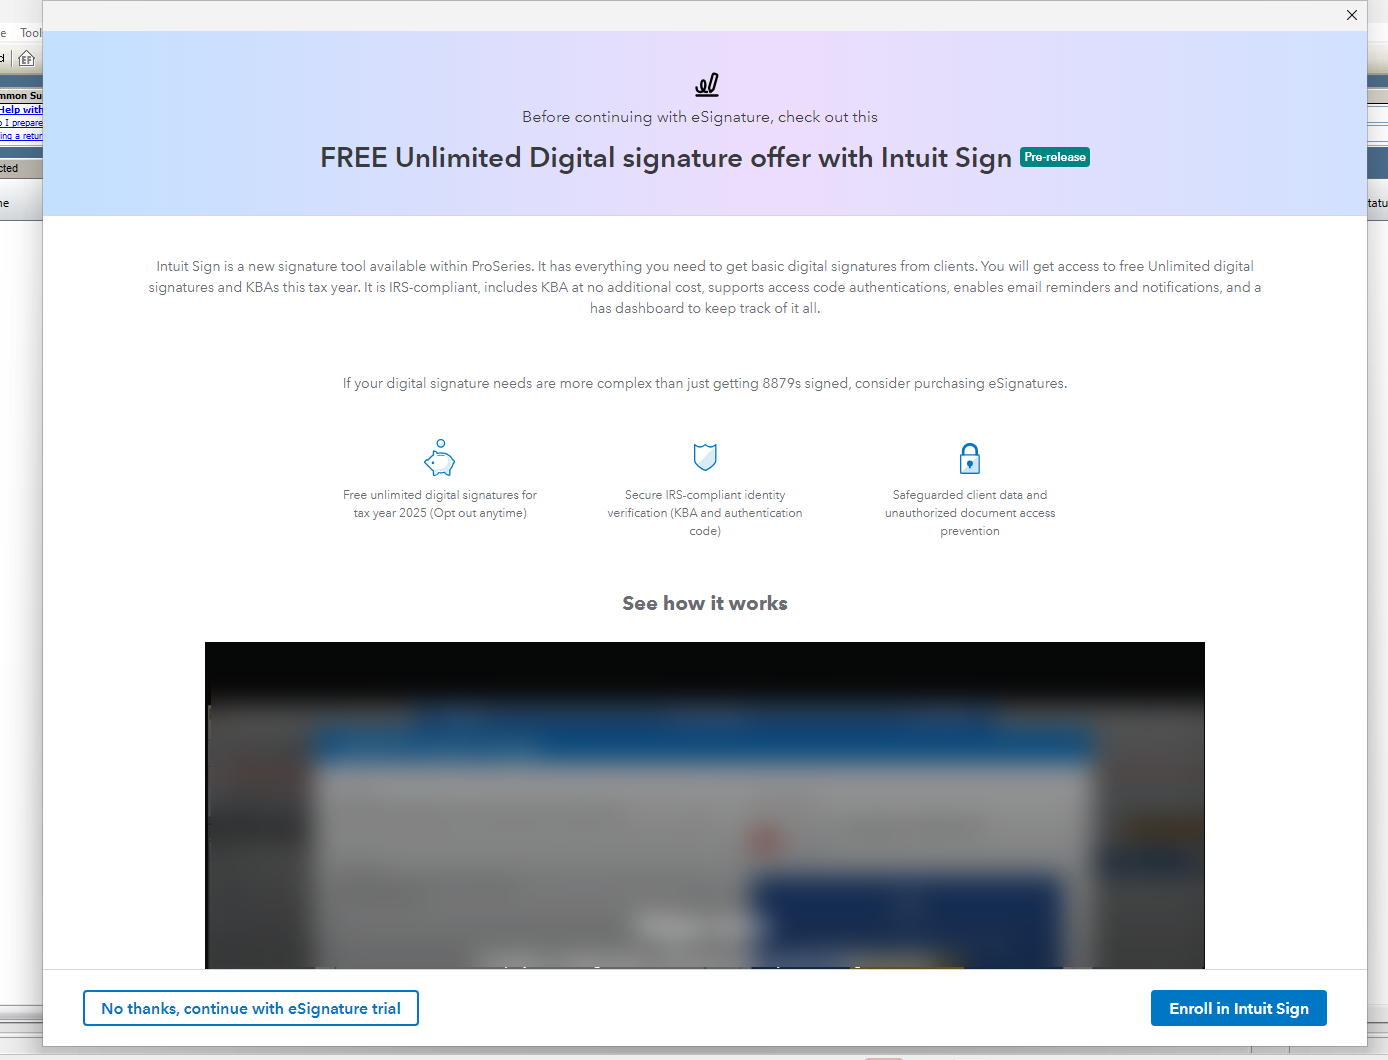
- To start the enrollment process, you can click on Dashboard from the toolbar, go to the Signature menu and select Request, or click the Claim 5 Free Intuit Sign button.
- A screen will appear with details about the Intuit Sign Pre-release.
- Note: Intuit Sign is designed for obtaining basic digital signatures primarily for Federal 8879 and state equivalent signature forms, as well as non-tax forms.
- Note: Intuit Sign is designed for obtaining basic digital signatures primarily for Federal 8879 and state equivalent signature forms, as well as non-tax forms.
- To sign up, select the Enroll in Intuit Sign button, located in the bottom right corner of the screen.
- If Intuit Sign does not meet your firm's needs and you wish to continue using the current Intuit Sign powered by DocSign service, click the No thanks, continue with Intuit Sign trial button.
- Important: Firms that opt out of the Intuit Sign pre-release will not be eligible to join the program again until its official release for the TY26 tax season.
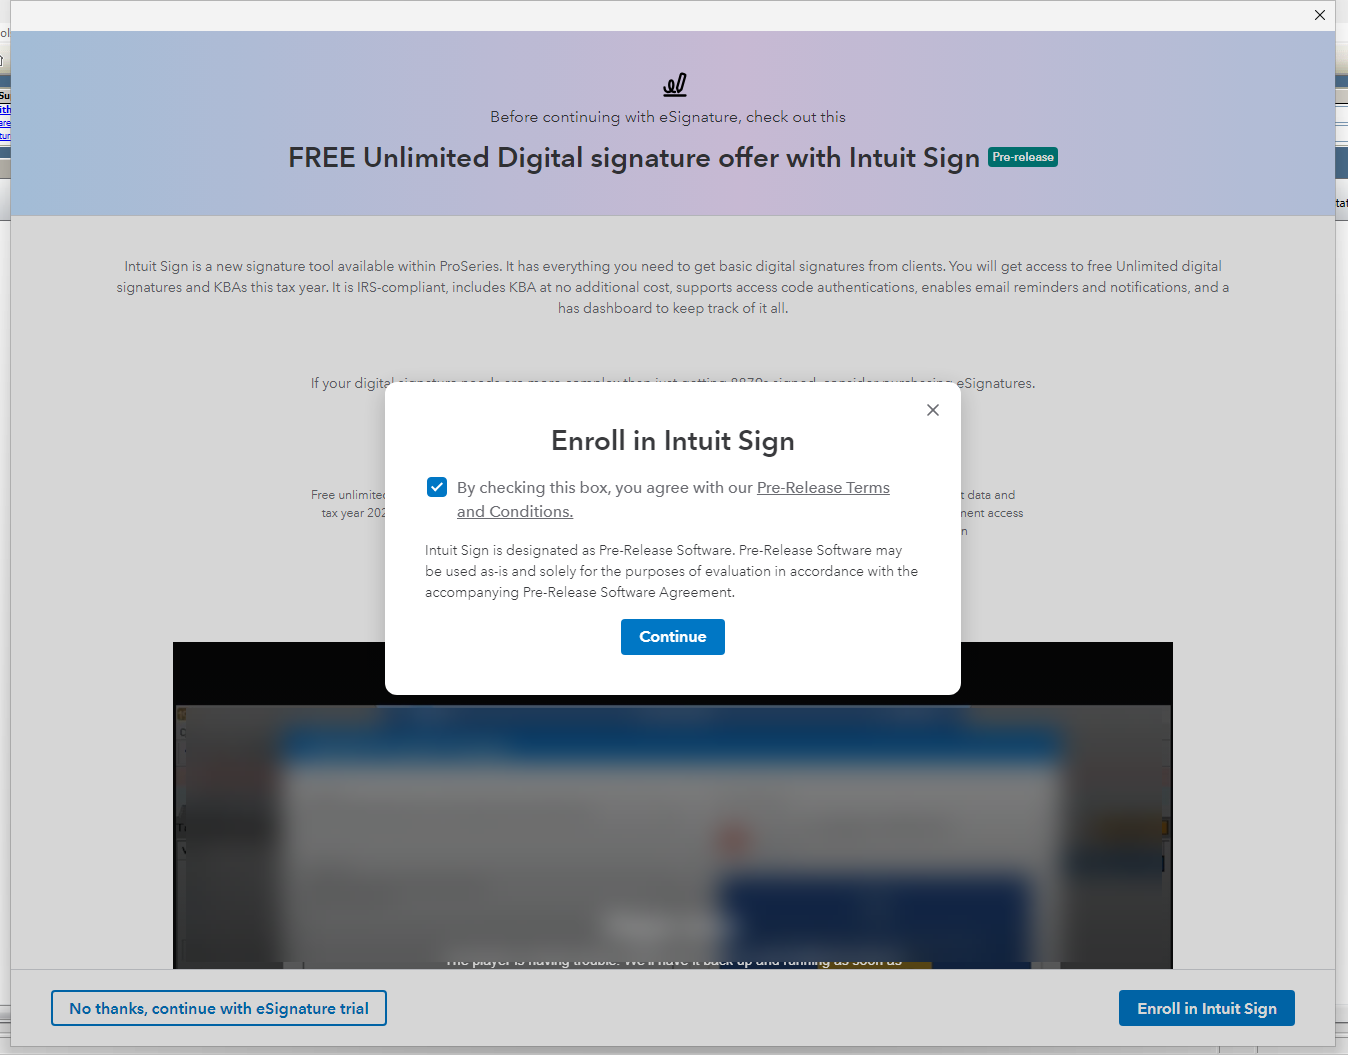
- Agree to Terms and Conditions:
- Click the link to read the Pre-release Terms and conditions.
- If you agree, check the box and click Continue.
- If you do not agree, click the 'X' to return to the previous step.
- On the subsequent screen, you can click the link to learn more about using Intuit Sign. Click Close when finished.
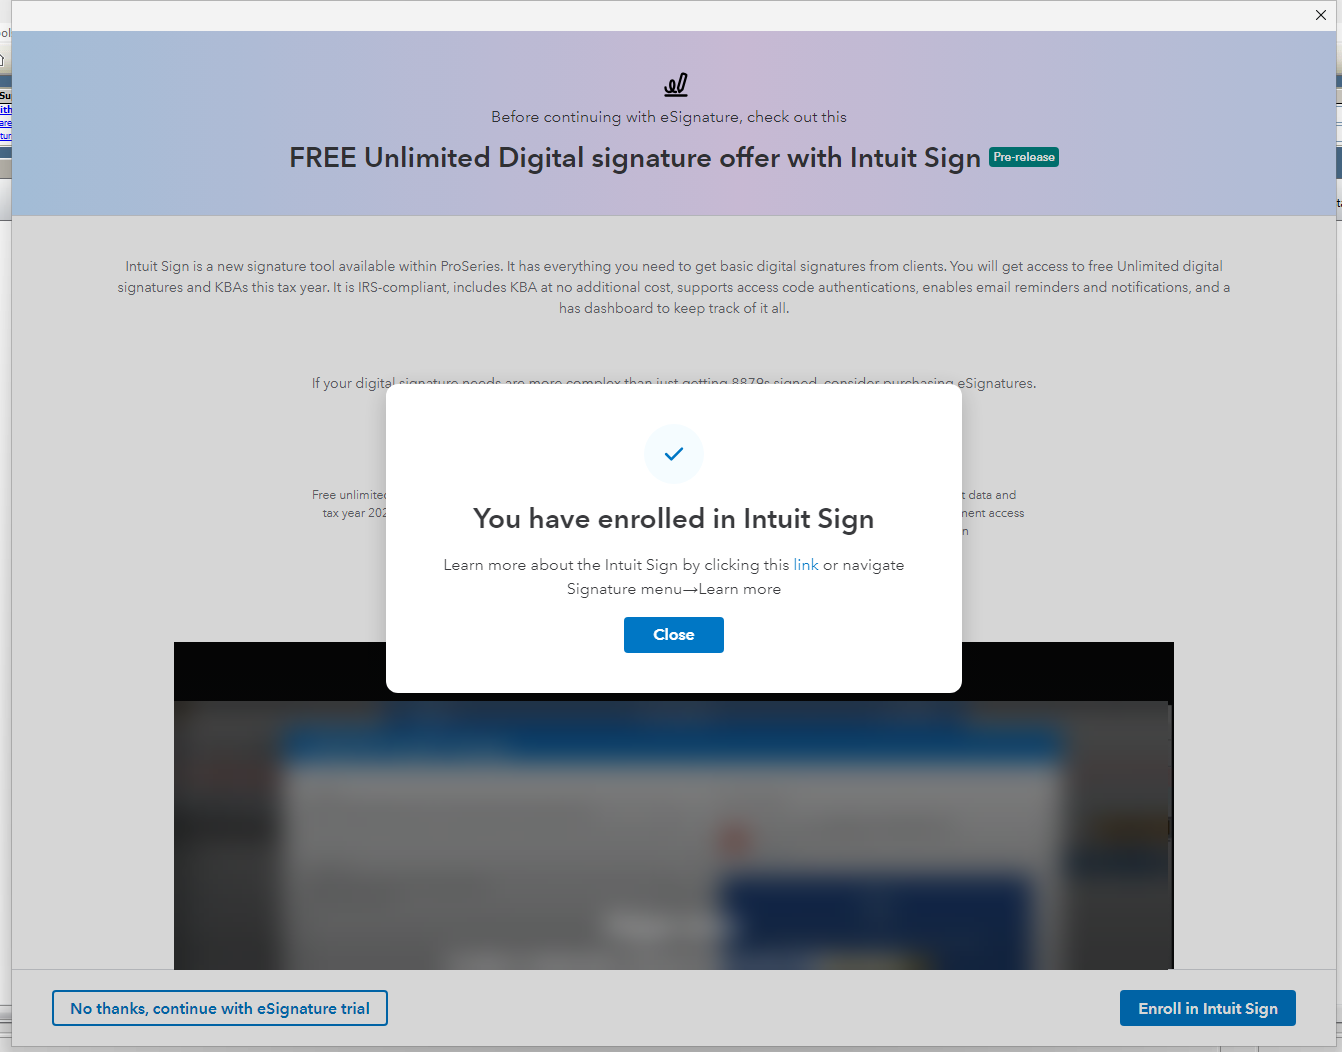
Your firm is now successfully enrolled in Intuit Sign. To begin using the service, select a client, navigate to the Signature menu, and choose the Request menu item.
Frequently Asked Questions
Who is eligible for the Intuit Sign pre-release? ProSeries firms that have not yet utilized the current Intuit Sign service, either for the current tax year (TY25) or in any prior tax years.
Can a firm opt-out of Intuit Sign at any time after enrolling?
Yes, firms have the option to opt-out of Intuit Sign at any time during the pre-release phase. Should a firm choose to use the existing Intuit Sign service instead, they must first purchase Intuit Sign credits to proceed. The Opt-out service is still being developed.
If a firm opts-out of Intuit Sign, what happens to the signature requests that have already been sent via Intuit Sign?
In-Process Signature Requests: Signature requests that are still in process will become unavailable upon opting out. Recipients will not be able to complete the signature process for these requests. We strongly recommend that clients either finalize these in-process signature requests or the preparer voids them before the firm opts out.
Completed Signature Requests: Completed signature requests will remain accessible from the Dashboard, allowing you to view and download the documents even after opting out.
If a firm is eligible for Intuit Sign but chooses to continue using Intuit Sign instead of enrolling, can they opt into Intuit Sign later? Firms that opt out of the Intuit Sign pre-release will not be able to join the program again until the official launch for the TY26 tax season.
Sending Intuit Sign requests
- Confirm the return is set up for e-filing in the Federal Information Worksheet.
- Resolve all Final Review errors.
- You can request signatures on common IRS forms, including Form 8879 (e-file Signature Authorization).
To send a request:
- From the EF Center (Professional) or EF Clients tab (Basic), select the client.
- From the Intuit Sign menu, select Request.
- Choose the forms to send (you can also include a copy of the return).
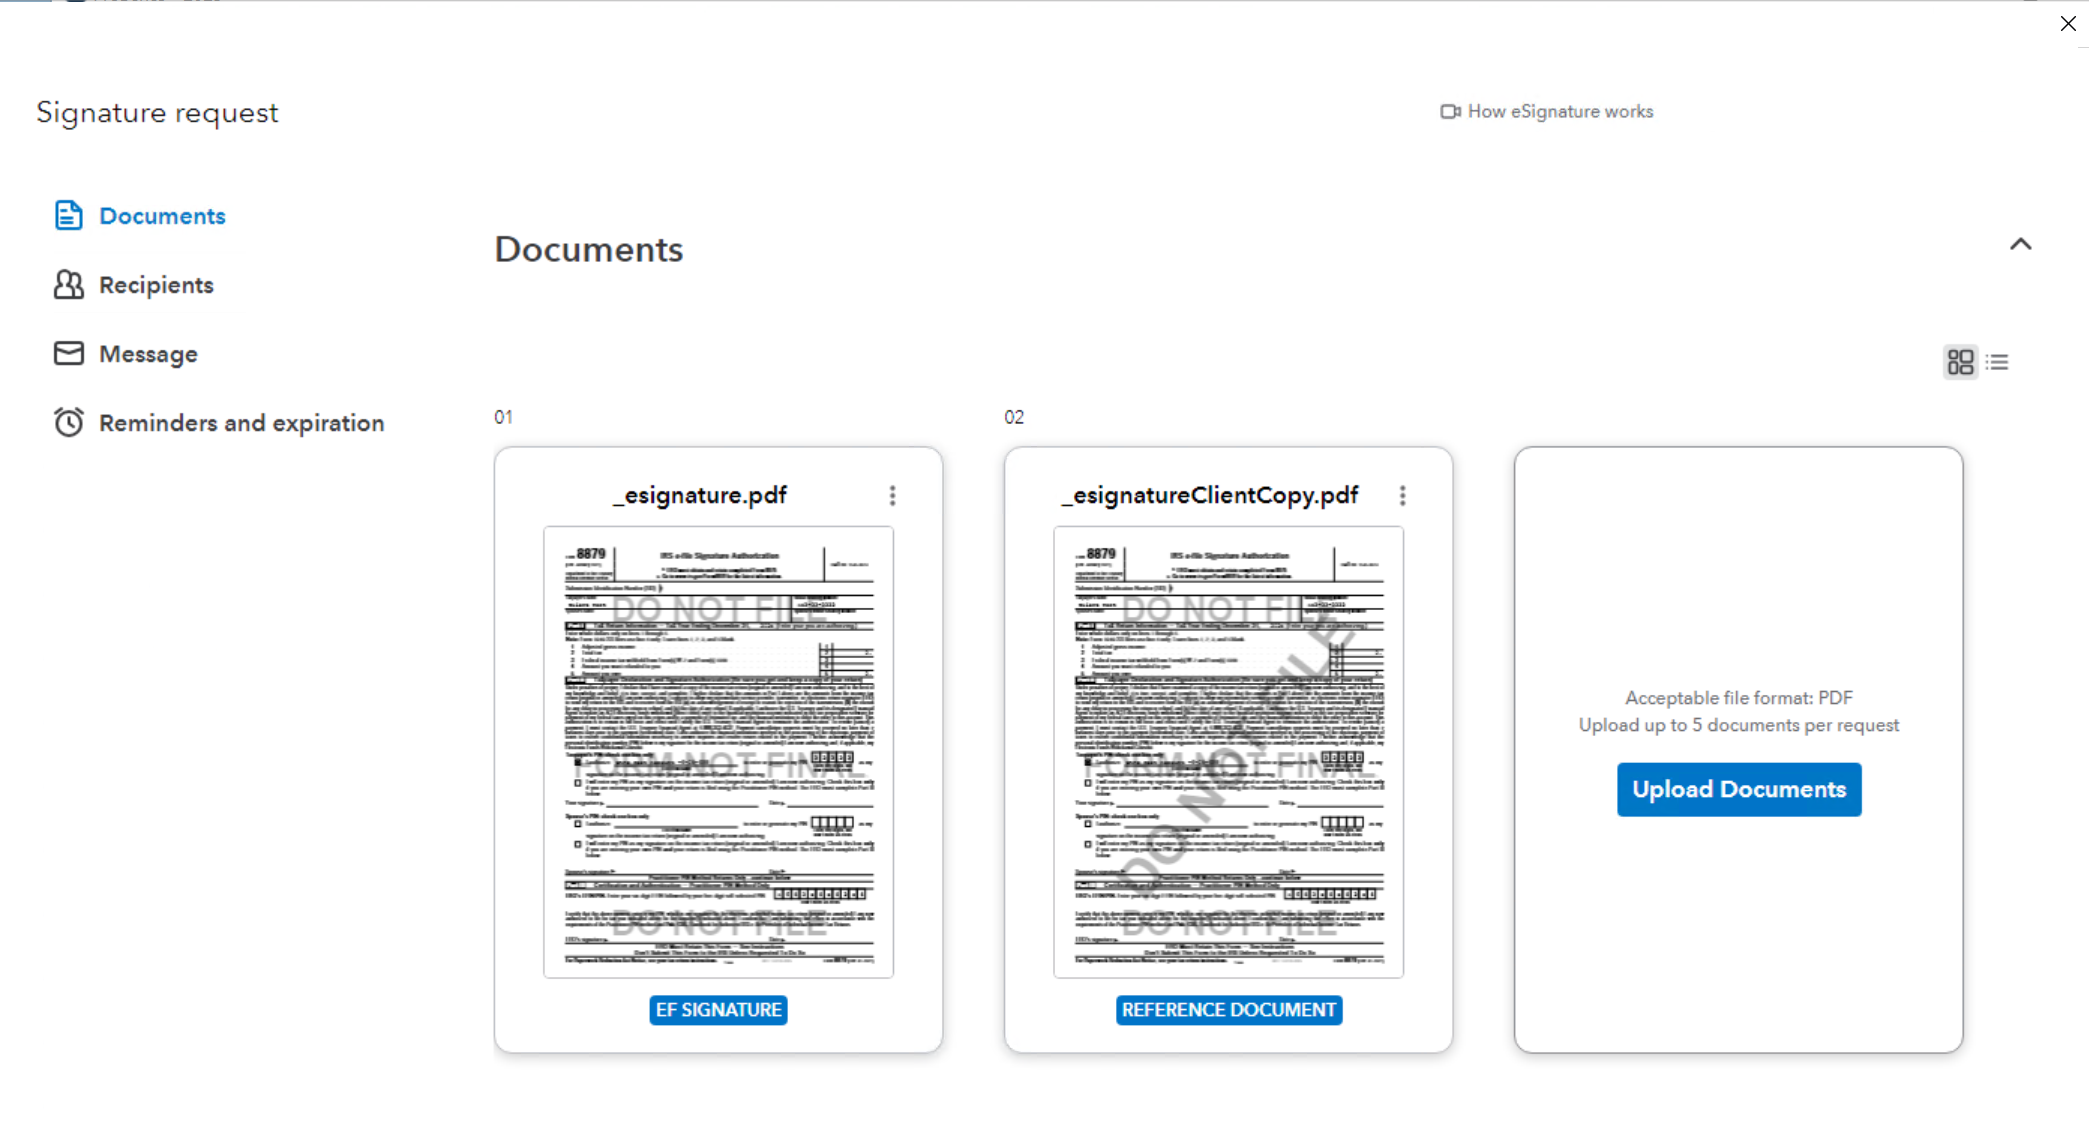
- Add or remove additional documents if needed. To add documents, select Upload Documents.
- You can upload a maximum of 5 documents per request. For more than 5 documents, we suggest sending multiple signature requests to the client.
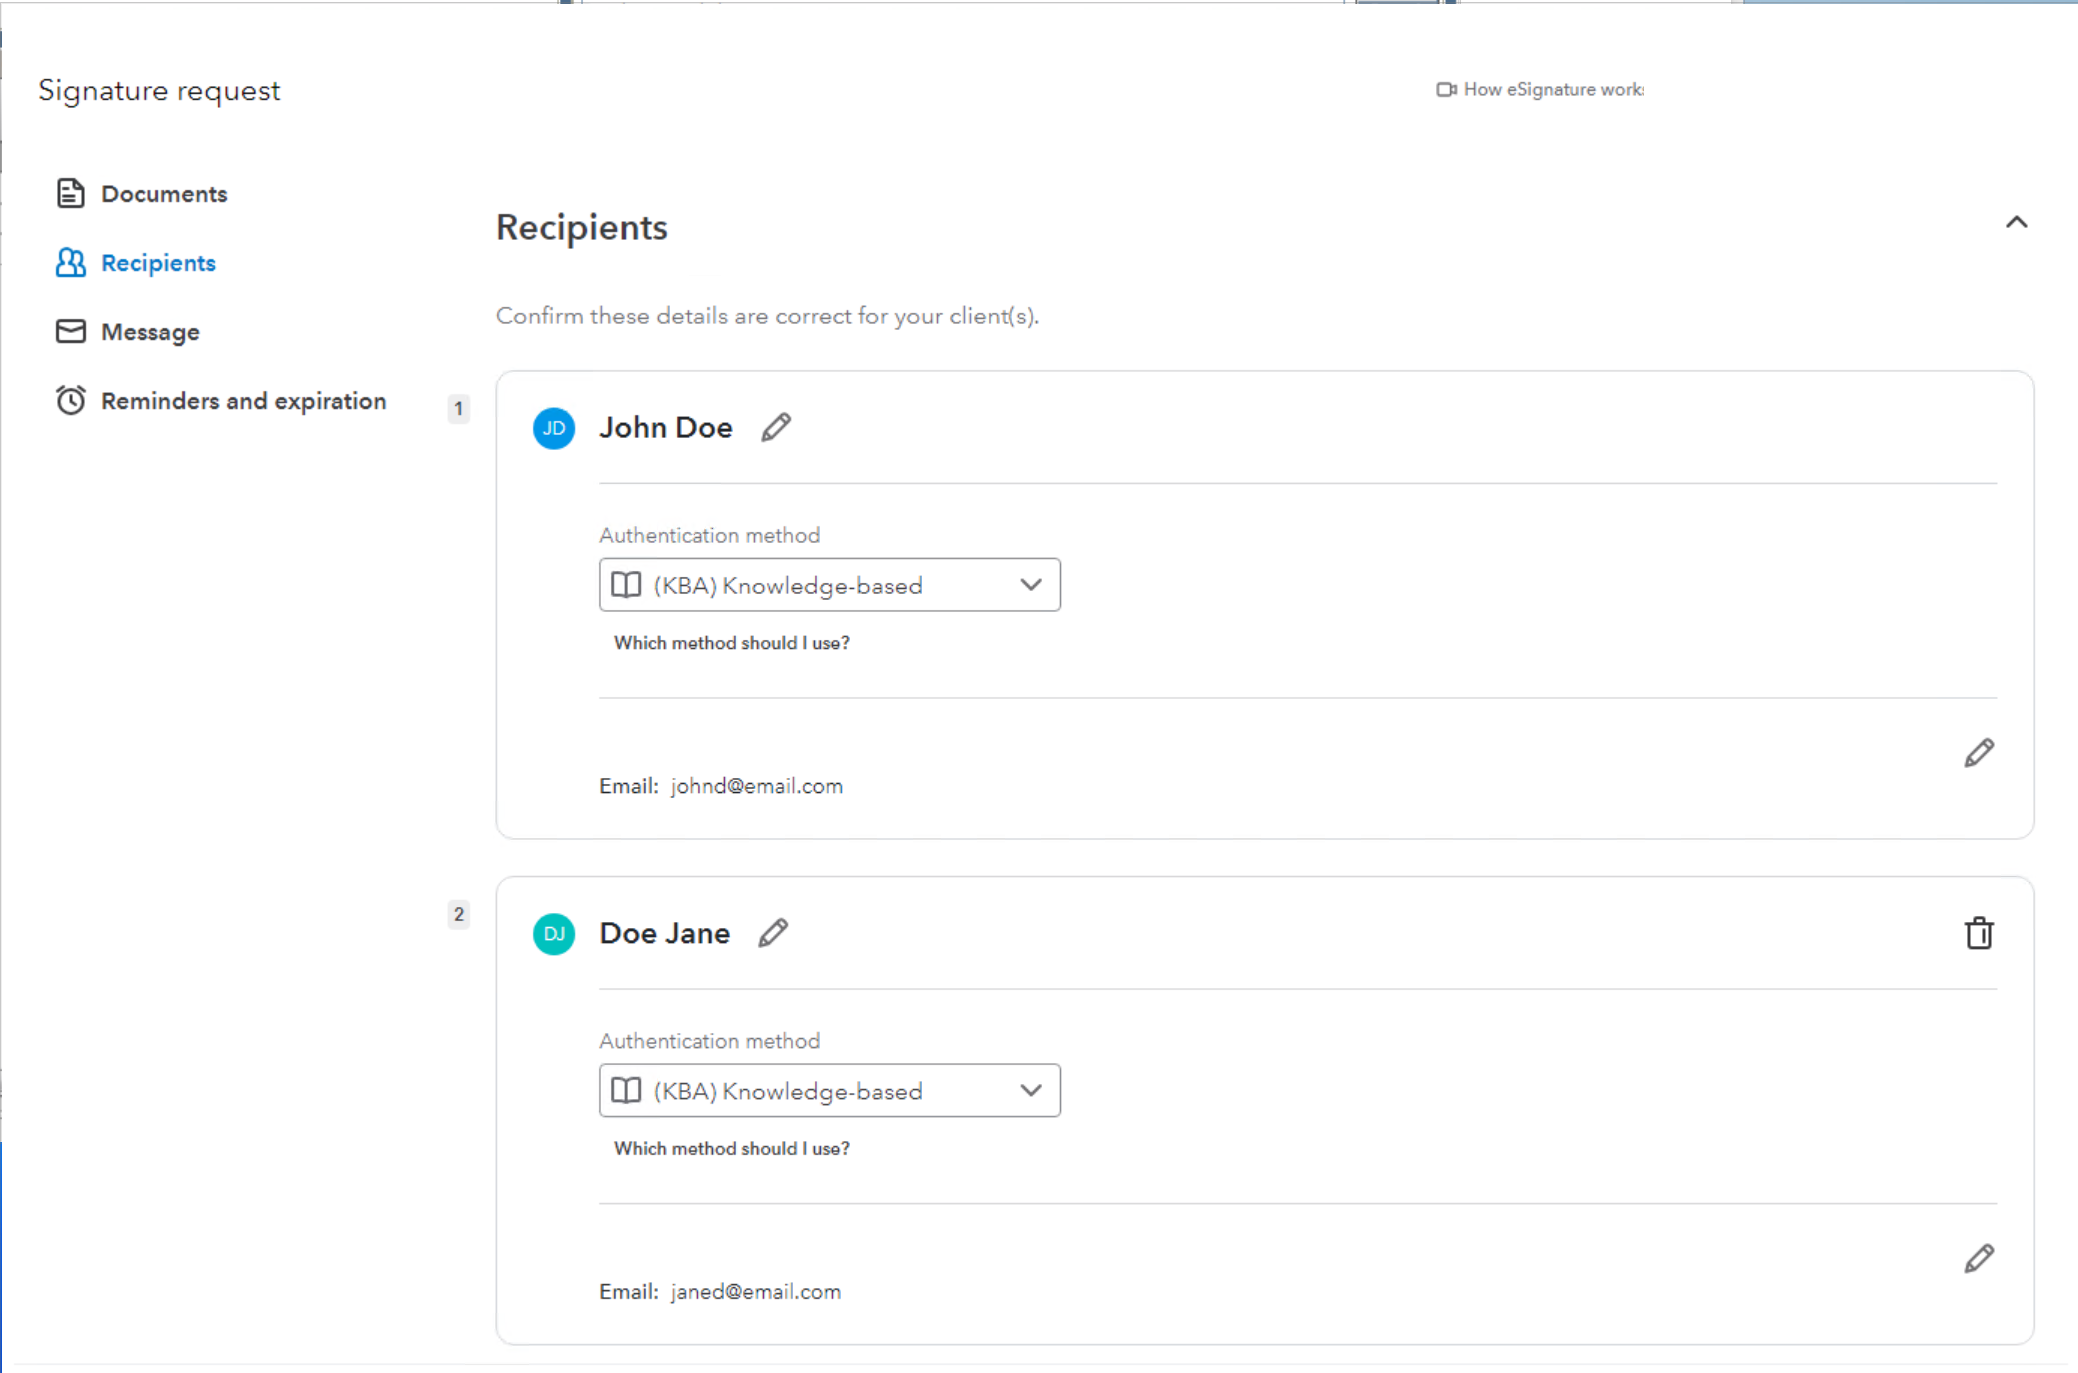
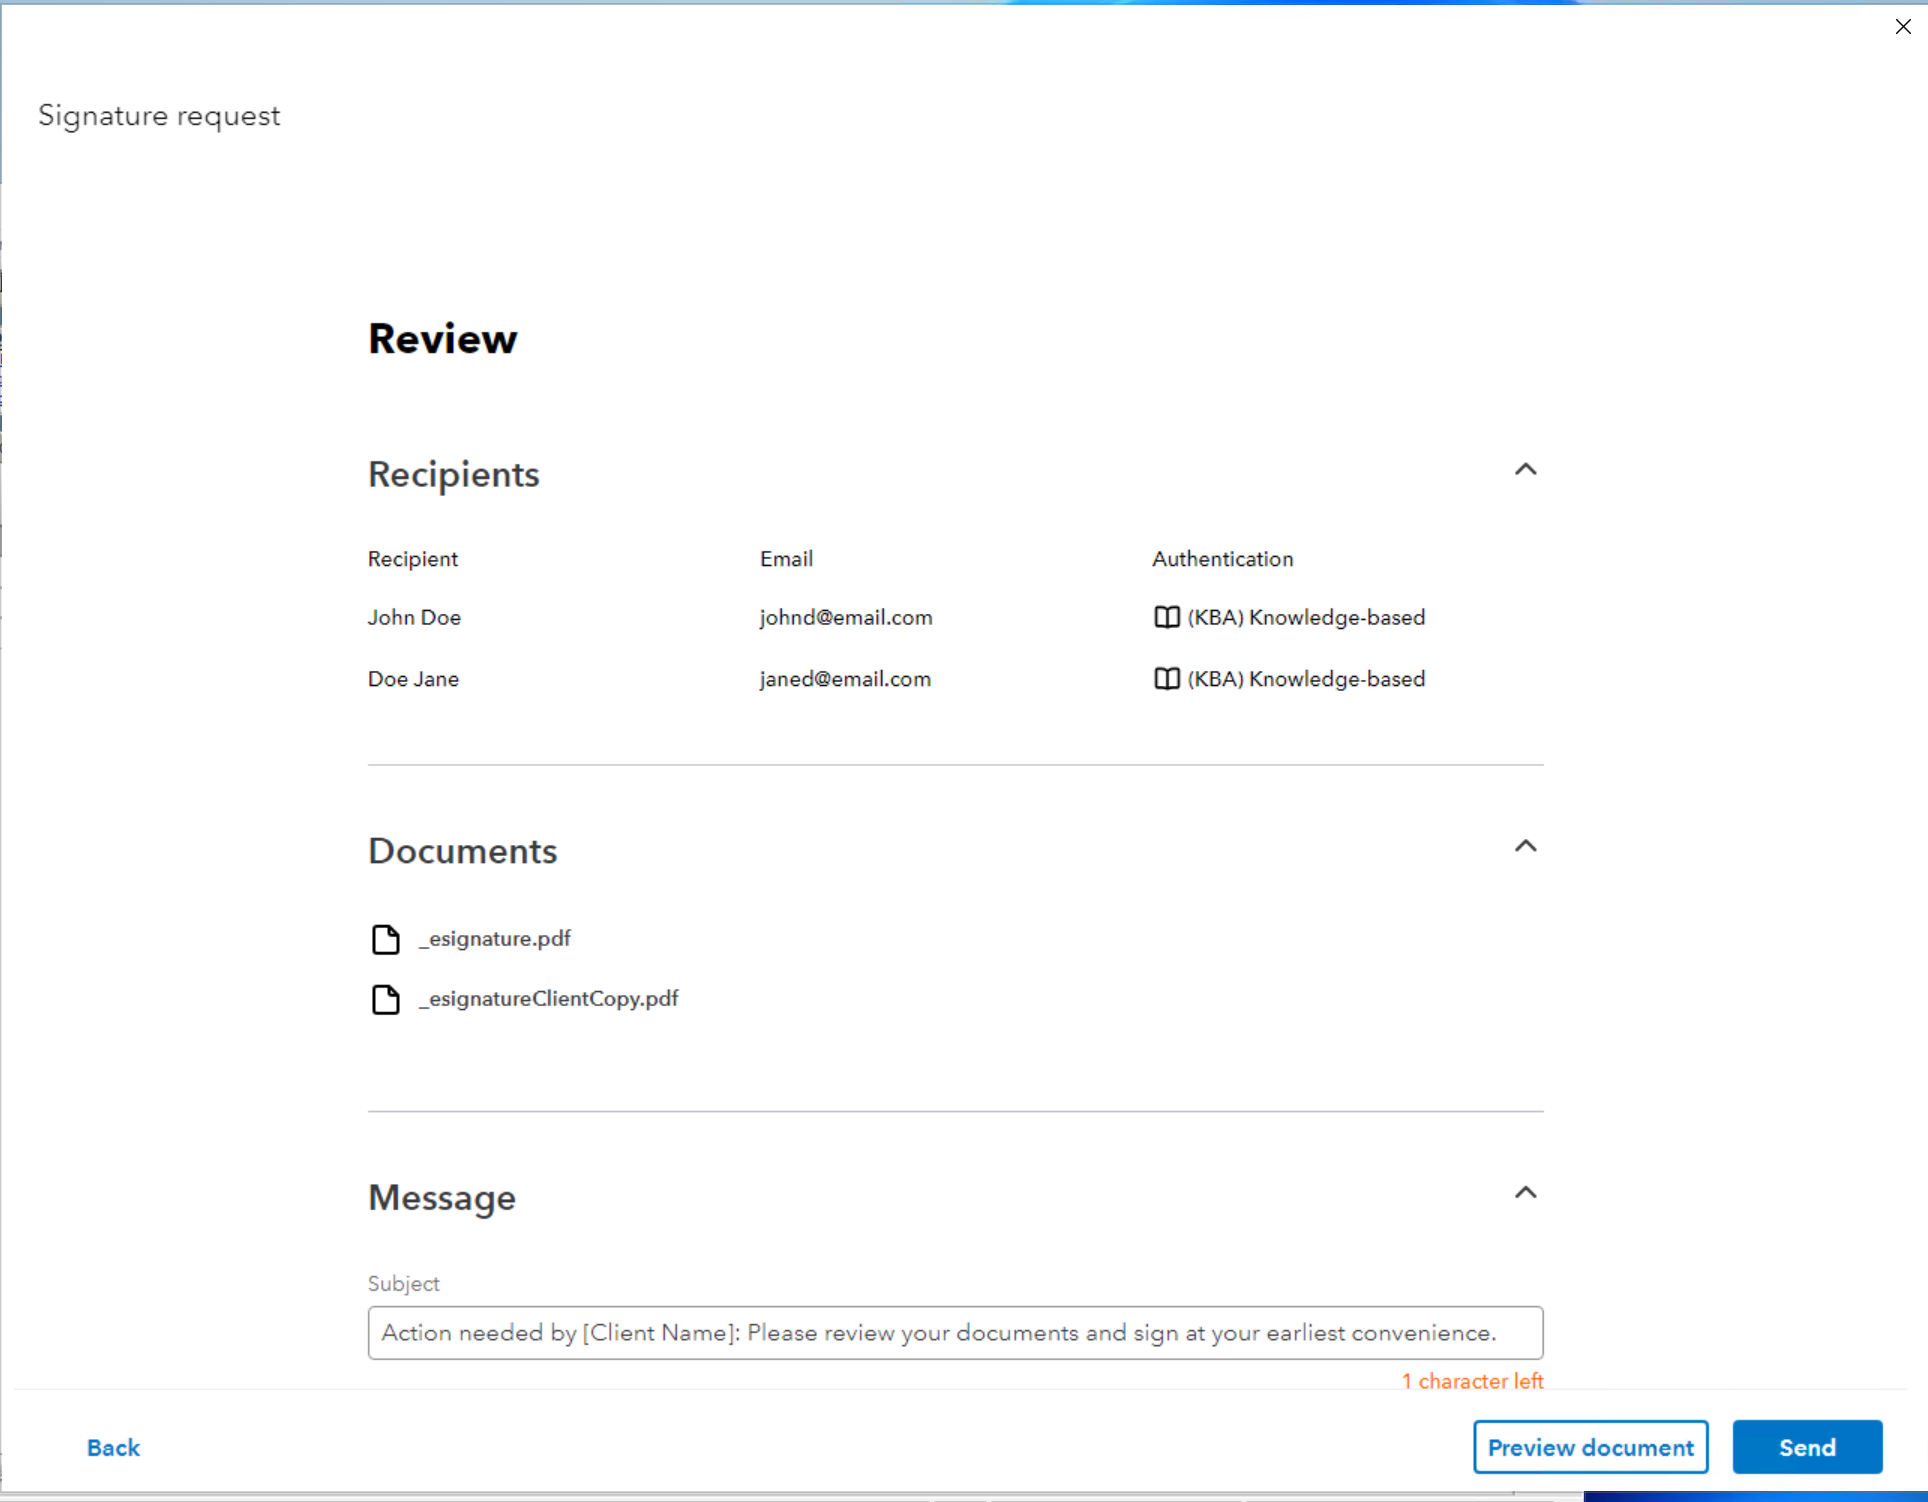
- Verify the recipient’s name and email.
- For business returns, ensure the recipient is an individual - not the entity name - to prevent KBA identity check failures.
- For business returns, ensure the recipient is an individual - not the entity name - to prevent KBA identity check failures.
- Choose an authentication method depending on your client type:
Individual clients
For 1040 clients, the default authentication method is KBA (Knowledge-Based Authentication), requiring the recipient to answer a series of security questions. This method cannot be changed unless the client is a returning client. See here for more information on returning clients.
Business clients
Business clients also default to KBA authentication; however, you have the option to change this method if desired.
Setup the message that will be sent to your client. Currently changes made to the message template cannot be saved.
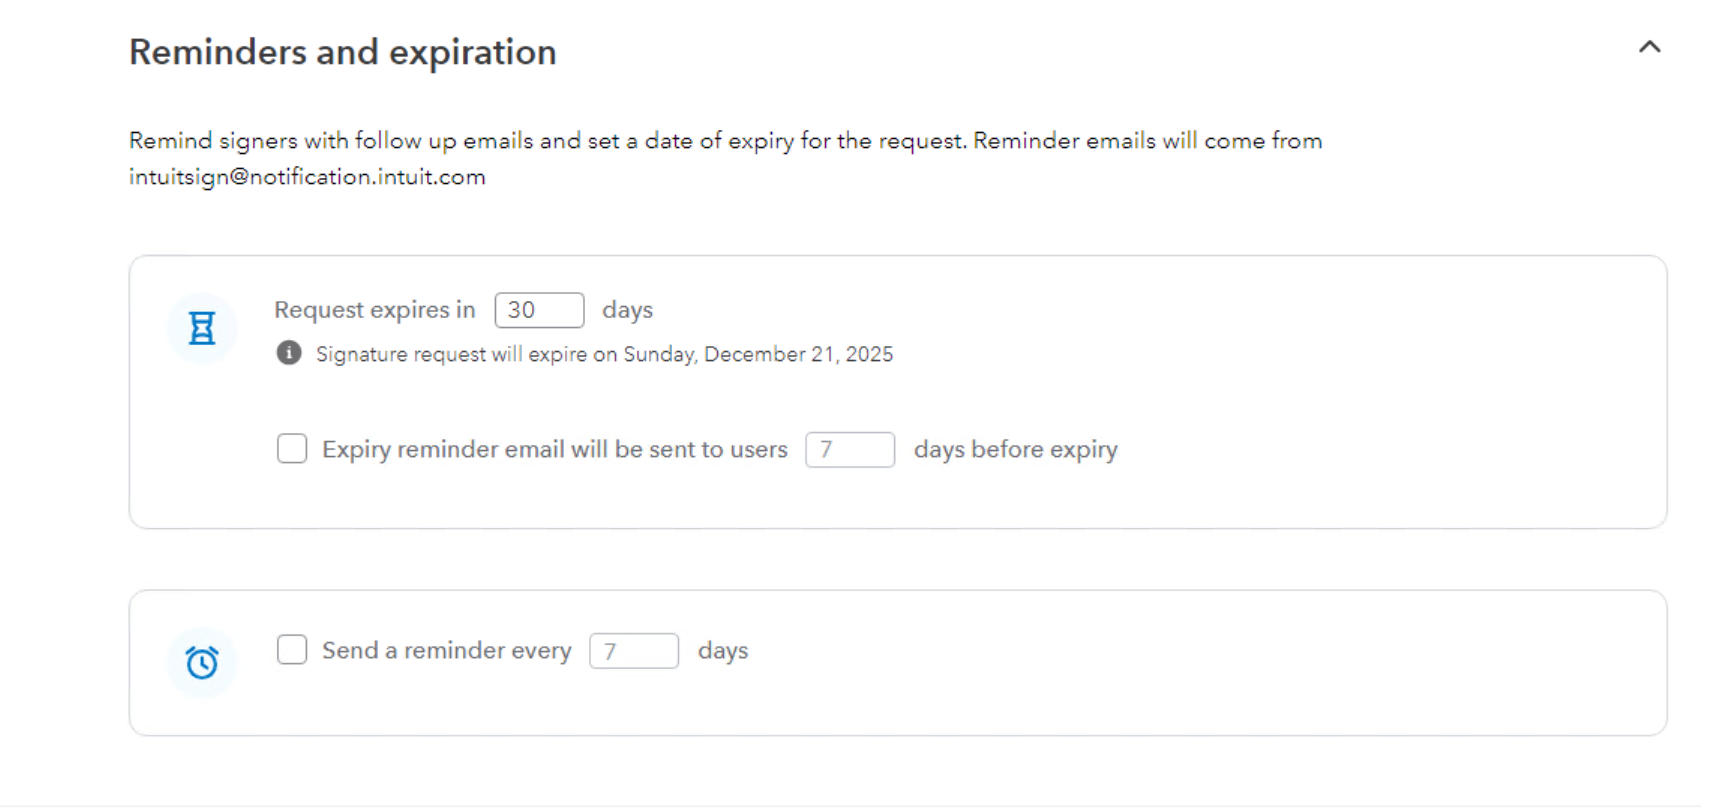
- Adjust reminders and expiration settings, if needed.
- Select Next
- Include Signature and Signing Date fields if additional documents requiring signatures are added. These fields will be automatically added by the program for Federal 8879 and State equivalent forms.
- Select Next to proceed to the final review screen.
- Before sending your request, review your settings. If any changes are needed, select Back. After your settings are confirmed, select Send.
Tip: You can share this How to review and sign your documents using Intuit Sign in ProSeries article with clients who need help using Intuit Sign.
Authentication options (identity verification)
When you send a request, choose how recipients verify their identity:
- Knowledge-Based Authentication (KBA): Recipients answer security questions.
- Access code: You provide a code separately that recipients must enter to view and sign.
- No authentication: Recipients can open and sign without extra verification.
Choose the option that best fits your firm’s security needs and the document you’re sending.
Adding additional documents
- From the Request screen, choose Upload Documents.
- Select the docuement and select Open.
- Reference documents don’t require a signature.
- On the next screen, you can add the Signature and Signing Date fields.

Viewing and downloading completed documents
- Open the Intuit Sign Dashboard and locate the client.
- Use the Actions menu to view or download completed forms.
Canceling an Intuit Sign request
- Open the Intuit Sign Dashboard.
- From the Actions menu, select Void Request.
- Confirm cancelation.
Note: Completed requests can’t be canceled. Send a new request if needed.
Tracking request status
Statuses display in the E-Sig Status column in HomeBase View. Common statuses include:
- Sent – request has been issued.
- Expired – request wasn’t signed in time.
- Declined – client declined the request.
- Failed Auth – client didn’t pass identity verification.
- Completed – request was signed successfully.
To update the client list status, navigate to the Intuit Sign menu and select Refresh Intuit Sign Status. For the Dashboard, click Refresh in the top right corner.
Feedback
We want to hear your thoughts! Let us know what you think.
Additional common questions
What is Knowledge-Based Authentication (KBA)?
Knowledge-Based Authentication (KBA) is exclusively for US citizens and residents who possess valid social security numbers. KBA also requires signers to have public records from which questions and answers can be generated; without these, KBA cannot be utilized.
For 1040 clients, the default authentication method is Knowledge-Based Authentication and cannot be changed, unless the firm e-filed a return for the same client in the prior year via ProSeries and an accepted return exists in EFE (Intuit's Internal e-filing system). In that specific scenario, the preparer is given the option to choose among KBA, Access Code, or no authentication method.
For Business clients, the default authentication method is also KBA. However, unlike the 1040 client, the “returning client” logic does not exist and the authentication method can be changed.
My client isn't receiving emails from Intuit Sign. What should I do?
Here are some steps you can take:
- Verify the email address: Go to the Dashboard and confirm the client's email address is correct in the "Email Address" column.
- Check the spam folder: The Intuit Sign email might have been directed to their spam or junk folder.
- Sender's email address: Intuit Sign emails will always originate from intuitsign@notification.intuit.com.
Why doesn't the spouse immediately receive the Intuit Sign request email for Married Filing Jointly?
For MFJ returns, the initial Intuit Sign request email is sent only to the primary taxpayer. The spouse will receive their signature request email only after the primary taxpayer has completed their own signature.
What document formats are supported?
Only PDF documents can be uploaded.
Is there a file size limitation for envelopes?
Yes, the total size of all PDFs within an envelope cannot exceed 25 MB.
Who qualifies for the Intuit Sign Pre-release?
Firms new to both ProSeries and the digital signature process within ProSeries.
What is the cost of Intuit Sign?
Intuit Sign is available to all firms participating in the Pre-Release program at no charge.
Can my client download their signed documents after completing the signing process?
Yes, clients can download their signed documents immediately after signing. They will also receive a completion confirmation email containing a one-time download link. This link is valid for 7 days after signing.
Opting out of the Intuit Sign Beta Program
Firms that opt out of the Intuit Sign pre-release will not be eligible to rejoin the pre-release program later.
To Opt Out of the Intuit Sign Pre-release Program and switch over to the eSignature experience:
- Navigate to the Signature menu.
- Select Purchase eSignature.
- Select your reason for opting out in the pop up.
- Select Next to complete the process.
Completed documents that were previously sent through Intuit Sign can still be viewed, and any existing outstanding requests can still be finished - however, all new requests for digital signatures will now be sent using eSignature.
More like this
