How to print mail labels for Lacerte clients
by Intuit•65• Updated 4 months ago
Lacerte comes with a set of predefined mail labels which can't be modified. To print labels using the predefined label formats, follow these steps:
- Select only the client(s) you want to print mail labels for on the Clients list.
- To select a group of clients, use the F3 key to use the Client Group Selection.
- To select specific clients, hold down the CTRL key and select each client you want.
- Select Print.
- Select Database Reports.
- Select the Mail Labels tab.
- The clients selected will display in the preview window.
- Select the Number of Copies you'd like to print in the Print Options section.
- Select the Print in Sets box if you want the labels to print in sets.
- Select the Label Name from the dropdown menu.
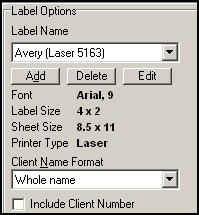
- Select the Client Name Format from the dropdown menu.
- Select the box, Include Client Numbers (if applicable).
- Select Settings to select the printer.
- Select Print.
You can only print mailing labels for one client at a time if you choose to include subclients with the mailing labels.
In addition to the predefined mail labels, you can also create custom labels. To create custom labels, follow the steps below:
- Select only the client(s) you want to print mail labels for on the Clients tab.
- To select a group of clients, press the F3 key to use the Client Group Selection.
- To select specific clients, hold down the CTRL key and click each clients you want.
- Click on Print.
- Select Database Reports.
- Click on the Mail Labels tab.
- Click on Add.

- Enter the Label Name.
- Select the Printer Type:
- Laser and Ink-Jet
- Dot-Matrix
- Select the Sheet Size from the drop down menu or click the Sheet Size button to manually add the label width and height.
- Enter or select the preferred Width.
- Enter or select the preferred Height.
- Click on Font to change the font used to print mail labels.

- Enter or select the preferred Label Spacing.

- Enter or select the preferred Line Position.

- Click Save.
Once you have created a custom mail label you can modify/edit it by:
- Select the custom mail label from the Label Name drop down menu.
- Click on Edit.
