Getting started with EasyACCT
by Intuit•2• Updated 3 weeks ago
Welcome to EasyACCT. This document will aid you in getting started with your EasyACCT product. Each section contains links to articles that will assist you on a variety of subjects.
Table of contents:
Downloading & installing

Signing into EasyACCT
 To enhance security for EasyACCT , users will need to log in every time they use the software with the upcoming 2024 release and beyond. These new login requirements for each EasyACCT system — Professional, Business, and Information Return — aim to increase security by ensuring that every individual user is authenticated before accessing data. To see more on signing in, click here.
If it is the first time Signing in to EasyACCT or Information Return System
- First, open the newly installed version.
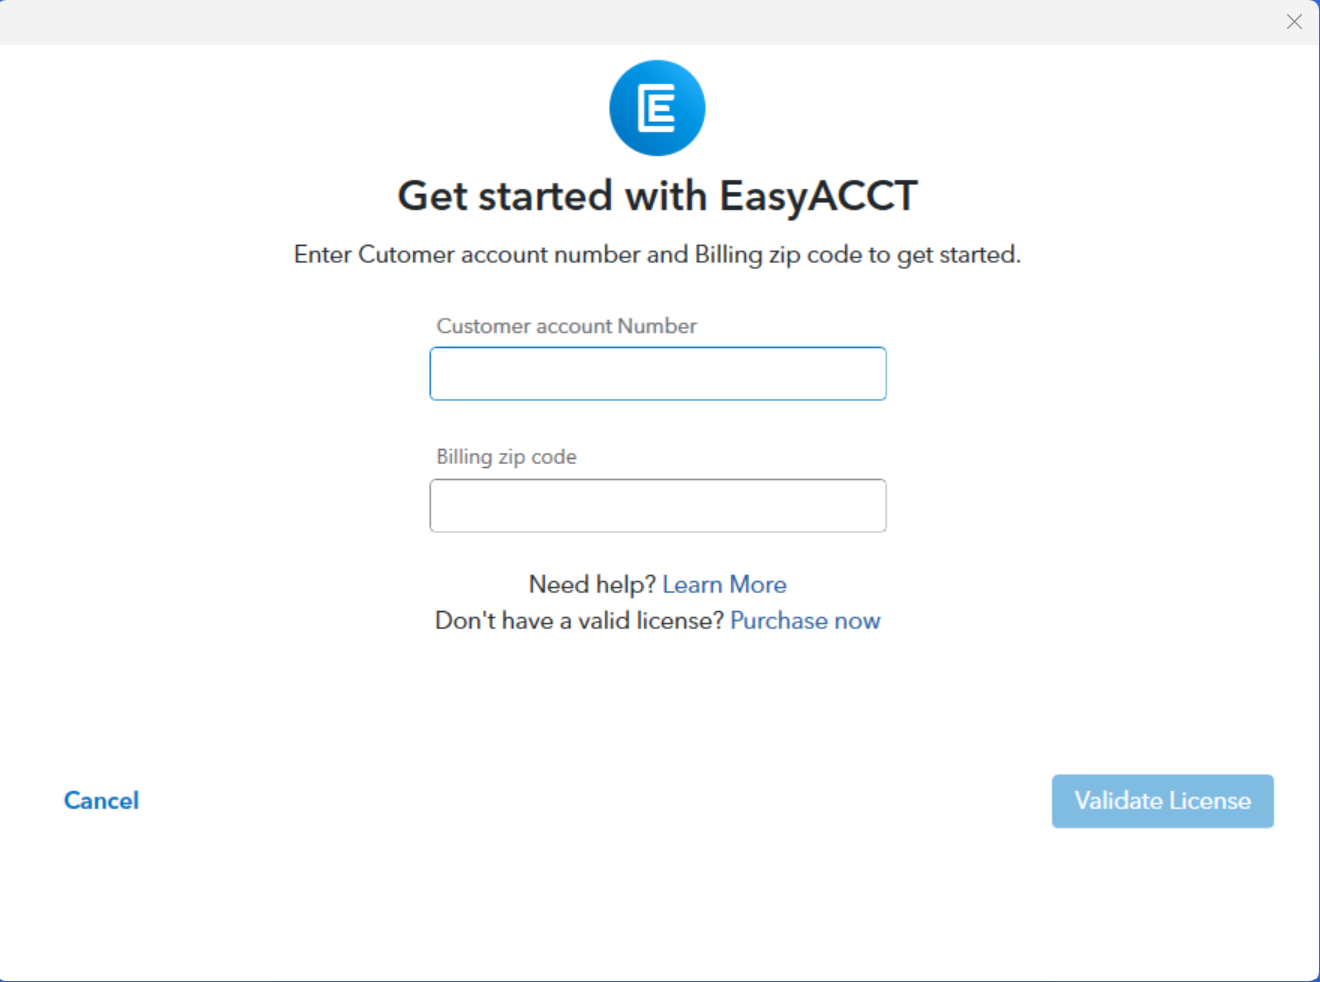
- On the Getting started with EasyACCT screen, enter your Customer Account Number and Billing Zip code.

- To locate your customer account number:
- Review the email with the payment invoice after purchasing EasyACCT or the Information Return System.
- Or, sign into MyAccount and select the Account icon, upper right, to view your account number and zip code.

- If you see a No valid license found error but have already purchased EasyACCT:

- Go to MyAccount to verify the account number and billing zip code.
- Call our EasyACCT Support line (866)-220-0488.
- To locate your customer account number:
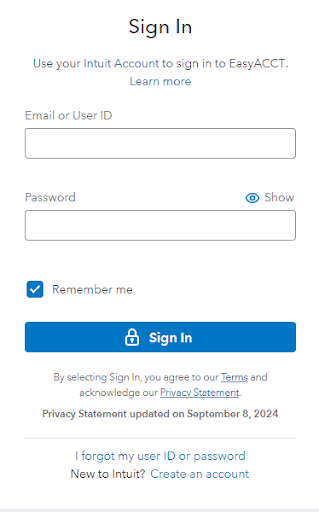
- Enter your username and password to sign into EasyACCT

- If this is your first Intuit product, select the Create an account link to get started.
For more information, see Manage Users for EasyACCT - If you are unable to sign in, see this article: Resolving sign in problems when signing into your tax product
- If the Sign in screen is blank, see this article: EasyACCT or IRS login screen appears as a blank window with no way to log in
- If this is your first Intuit product, select the Create an account link to get started.

Setting up the program
- How to use the Company Setup Wizard in EasyACCT
- How to Set Up Passwords in EasyACCT
- How to Back Up and Restore Company Data
How to set up or changing the default data path
- From the Company Selection screen, select System, System Utilities, and then System Characteristics.
- In the Path for Company Data field, select the down arrow to browse to the correct path.
- For example, X:\EASYW\DATA.
- Select OK to select the path.
- Select OK again to close the screen.
- Close the program.
- Re-open the program.
- The program should open to the new default path.

Write up
- Setting Up a Chart of Accounts
- Entering beginning general ledger account balances in EasyACCT
- How to Set Up a Departmental or Divisional Company
How to set up financial statements
The financial statement design can be copied from an existing company or sample company using the Company Wizard. Note that if you're using the Company Wizard, the companies should have the same Chart of Accounts. Alternatively, the statements can be created from scratch using the Financial Statement Templates, as described below. Afterwards, you can make customizations using the Custom Statements feature.
Follow these steps to set up the Balance Sheet, Income Statement and Statement of Cash Flows to print using the statement templates:
- Go to Write-Up, Update Company Files, Financial Statements and select Statement Templates.
- Select the Type of Financial Statements.
- Enter a Statement Message Line to print at the bottom of each page on the financial statements.
- Select a Font Name and Font Size.
- Each financial statement has its own tab to specify account ranges. It is recommended not to have any gaps from one section to the next, even if that involves using non-existent accounts as the beginning and ending accounts. For example, the Beginning Account number for Fixed Assets (i.e. 1500) should be one number higher than the Ending Account number for Current Assets (i.e. 1499).
- Enter the following on the Balance Sheet tab:
- Statement Title.
- For example, "Balance Sheet."
- Beginning and Ending Account ranges for each section:
- Current Assets
- Fixed Assets
- Other Assets
- Current Liabilities
- Long Term Liabilities
- Equity
- Statement Title.
- Enter the following on the Income Statement tab:
- Statement Title
- For example, "Income Statement."
- Beginning and Ending Account ranges for each section:
- Revenue
- Cost of Sales
- Operating Expenses
- Other Income/Expense
- Statement Title
- Entering the follow on the Cash Flow tab:
- Statement Title
- For example, "Statement of Cash Flows."
- Beginning and Ending Account ranges for each section:
- Cash or Cash Equivalents
- Depreciation Expense
- Accumulated Depreciation
- Amortization Expense
- Accumulated Amortization
- Gain or Loss on Asset Sales
- Accounts used for Sold Assets
- Accumulated Depreciation for Sold Assets
- Retained Earnings Accounts
- Distributions of Profits (Dividends)
- Statement Title
- Enter the following on the Balance Sheet tab:
- Select Save.

Payroll
- Setting Up Payroll Templates
- Setting Up SUTA Rates and Limits
- Creating a Payroll Tax Table for State or Local Taxes
- Setting Up Tipped Employees
- How to set up garnishments
- How to set up a 401(k) deduction in EasyACCT
- How to accrue vacation time, sick pay, or paid time off in EasyACCT
- Setting Up Direct Deposits

Accounts receivable
- Setting Up Customers in Accounts Receivable
- How to Set Up Automatic Customer Invoices in Accounts Receivable
How to set up products or services for accounts receivable
- Go to Accounts Receivable > Update Company Files > Update Products/Services.
- Enter an identification number for the item in Product/Service Code.
- The code can be letters, numbers, or a combination of both, up to 14 characters in length.
- Select the Product/Service Code arrow or press Alt-V to view a list of items you've previously set up. Then, select the applicable item from the list and select OK or press Enter.
- Enter a Description for the item using up to 80 characters.
- Select the arrow next to General Ledger Code and select the Sales G/L code from the dropdown list.
- G/L codes are set up on the Transaction Options on page 2 of the A/R Setup Wizard.
- Up to 99 sales codes are allowed.
- The G/L Code indicates which accounts to debit and credit when posting the transaction to the General Ledger module.
- G/L codes are set up on the Transaction Options on page 2 of the A/R Setup Wizard.
- Enter the price for the item in Selling Price.
- You can override this amount when entering the invoice during transaction entry.
- Select the Charge Sales Tax checkbox if the item is subject to sales tax.
- Clear this check box if the item is not subject to sales tax.
- The sales tax rate is determined by the tax code assigned in the Customer Information screen.
- Type any additional notes that are applicable to the item in Comments.
- Select Save.

How to set up a customer discount
- From Accounts Receivable, select Update Company Files, and then Update Products/Services.
- Enter the Product/Service Code that you want to use for this item.
- Enter the Description.
- For example, "Discount."
- Select the General Ledger Code for the item.
- Enter the discount amount as the selling price.

Accounts payable

Asset depreciation

Bank reconciliation

Utilities
- Importing or Exporting Data to a Spreadsheet
- Transferring from EasyACCT to Lacerte
- Transferring 1099s W-2s 940s and 941s from EasyACCT to the Information Return System

