Manage Users for EasyACCT
by Intuit•1• Updated 3 weeks ago
Intuit prioritizes the security of our products and safeguarding customer information. To enhance security for EasyACCT, users will need to log in every time they use the software with the upcoming 2024 release and beyond.
These new login requirements for each EasyACCT system — Professional, Business, and Information Return — aim to increase security by ensuring that every individual user is authenticated before accessing data.
If you own a firm, manage your own office, or are the sole EasyACCT user in your office, you must:
- Complete initial setup
- Invite additional software users (if applicable)
If you're purchasing this software for your client, they'll need an Intuit account to access it.
You can then invite them as a user from the 'Manage Users' section of your account, or
Your client can purchase the product individually and create their own Intuit account here https://myproconnect.intuit.com/.
If you've already completed the initial setup, we encourage you to check your firm's sign-in credentials.
Table of contents:
Complete the initial setup
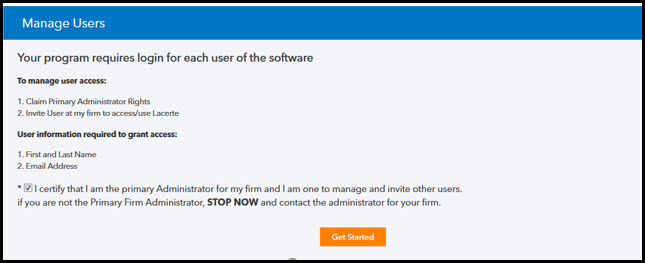
Every firm will need to designate one person in their firm to be the Primary Firm Administrator. This person will be responsible for managing software access for users within your firm. If you are the only software user in your firm, you will be the Primary Administrator. The Primary Firm Administrator may provide administrator access to other users in your firm. All users of the software must have their own individual login. If you will serve as your office's Primary Firm Administrator, follow the steps below:
- Sign in to MyAccount.
- You may be prompted to verify your identity via multi-factor authentication (MFA). MFA will also prompt when accessing your account from an unrecognized device. For steps to verify your identity, see here.
- If you don't have an account, select Create an Account and follow the on-screen prompts. If you already have an account, skip this step.
- On the Manage User page, select Get Started.

- You'll need to acknowledge that you are the authorized administrator for your firm before you can select Get Started.
If you've already completed the initial setup, we encourage you to check your firm's sign-in credentials.

Change user roles
- See here to sign in to the My Account Manage Users page.
- Select Edit for the user.
- Use the Role section to select the employees My Account access level:
- Admin - Access to view and edit all My Account and Program administrative functions.
- Billing Admin - Access to view and edit billing profile functions.
- Employee - View only access to My Account and edit access to payment methods associated with online profile.
- Training Support - Access to software, training, and support only. No access to administrative functions.
- Under Software roles select a role:
- Employee - Software access only.
- Admin - Software access with the ability to invite, edit and manage users.
When assigning an Admin Role, you will be prompted for MFA to complete the change, if you don't have 2-FA turned on to log into My Account.
If you are viewing Manage Users as an Admin and this action is not available, you may need to clear your browser cache.

Invite a user
- See here to sign in to the My Account Manage Users page.
- Select Add user
- Enter the following information to complete the invitation:
- First name
- Last Name
- Use the Role section to select the employees My Account access level:
- Admin - Access to view and edit all My Account and Program administrative functions.
- Billing Admin - Access to view and edit billing profile functions.
- Employee - View only access to My Account and edit access to payment methods associated with online profile.
- Training Support - Access to software, training, and support only. No access to administrative functions.
- Use the Software role to control software access
- Employee - Software access only.
- Admin - Software access with the ability to invite, edit and manage users.
- Select Send invitation.
- Make sure the invitation was sent by looking for a Pending Invitations for the user.
When assigning an Admin Role, you will be prompted for MFA to complete the change, if you don't have 2-FA turned on to log into My Account.
If you are viewing Manage Users as an Admin and this action is not available, you may need to clear your browser cache.

Re-invite a user
- See here to sign in to the My Account Manage Users page.
- Locate the that shows the Status of Invited.
- Select Resend invite.
- The new invite will be sent.
If you are viewing Manage Users as an Admin and this action is not available, you may need to clear your browser cache.

Delete a user
- See here to sign in to the My Account Manage Users page.
- Select Edit for the user.
- Select Delete user.
- Select Yes, Delete to confirm.
- From the Manage Users page, make sure the deleted employee is no longer showing in the table.
If you are viewing Manage Users as an Admin and this action is not available, you may need to clear your browser cache.

Cancel a pending invitation
- See here to sign in to the My Account Manage Users page.
- Locate the user.
- Select the three dots and choose Delete.
If you are viewing Managed Users as an Admin and this action is not available, you may need to clear your browser cache.

How a new user accepts your invite
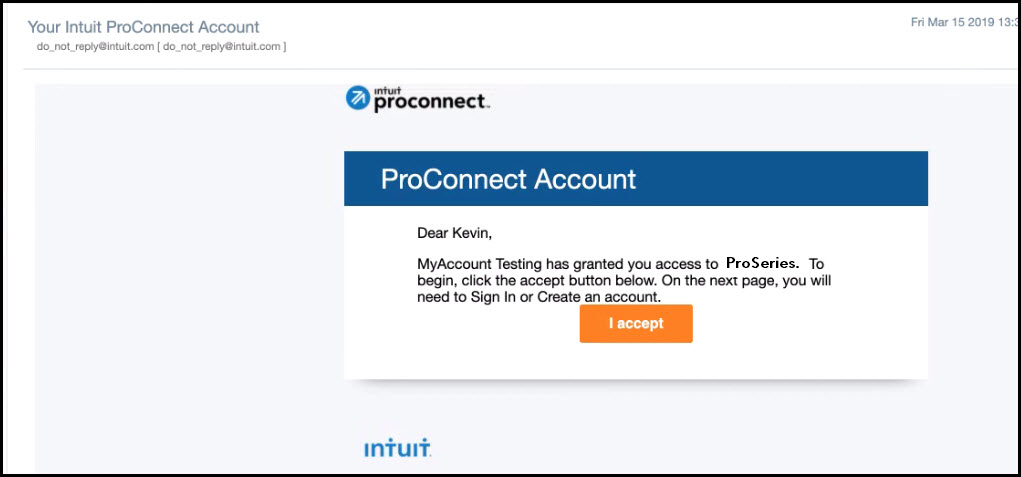
- Check your email for an invite from an Admin.
- Open the email titled Your Intuit ProConnect Account that came from do_not_reply@intuit.com.
- If you don't see the email be sure to check your junk folder.
- Select I accept.

- If this is your first time signing into the web page, enter your information in the Create your account screen. If you already have an account, select Already have an account? Sign in.
- Once you can successfully sign in to the web page you'll be able to sign in to the program.

Verify your sign-in credentials
- Open your EasyACCT software.
- Enter your Email/User ID and Password.
- Select Sign In.
Once you've verified access to your EasyACCT software, no additional action is required.

Turn on or off two-step verification
Two-step verification is an optional security function you can turn on or off that will require Multi-Factor Authentication every time you sign in. This setting does not control the automatic Multi-Factor Authentication that triggers when you are signing in from a new device or if your cached sign in has expired.
- Sign in to My Account using your user name and password.
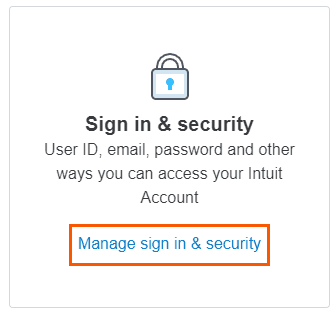
- Under the Sign In & Security select Manage sign in & security.

- Next to Two-step verification select Turn On.
- Choose your verification method and select the Turn On button.
- Confirm your choice:
- For text message confirm your password and select Turn on text message verification.
- For voice call verification enter the code you receive from the automated phone call and select Continue.
To disable two-step verification choose Turn Off on Step 3.

Select a primary admin and transfer rights
Note: If the current Primary Admin is no longer available to follow these steps, refer to Requests to be the Primary Admin or Contact.
Typically these requests can take up to 5 business days to complete.
The following steps need to be completed by the current Primary Admin:
- See here to sign in to the MyAccount Manage Users page.
- Review the list of users for the one user with Software Access showing Admin (Primary). Only this user will have the ability to transfer the primary admin rights to another user.
- On the list find the user that will be changed to Primary Admin.
- Select the three dots.
- Select Change Primary Admin.
- Select the Submit Transfer button.
- The admin selected will receive an email requesting that they accept or deny the request.
- Upon acceptance, you will receive an email indicating the successful transfer of your primary admin rights.

More like this
- Manage Users login required for Intuit Linkby Intuit
- Manage Users for Lacerteby Intuit
- Manage Users for ProSeriesby Intuit
- What's new with EasyACCTby Intuit

