Maximize efficiency by using the input drawer to review flagged items, import documents, view or edit the organizer, and track your clients' Intuit Link activity — all without leaving the tax return.
- See here to learn more about Intuit Link.
How to import data:
- Go to the Input Return workspace.
- Click the Lightning bolt icon on the right side of your screen to open the data import panel.
- If the documents you wish to import aren't already listed, click Browse to choose files from your computer.
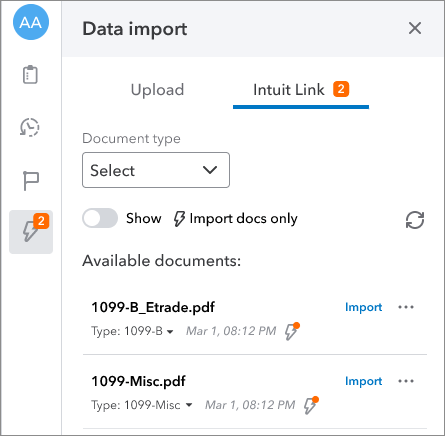
- If your client has already accepted an Intuit Link invitation this year, you’ll be able to switch between Upload and Intuit Link.
- The Uploads list will show documents added by your firm, and the Intuit Link list will display documents your client uploaded.
- Under the Uploads tab, you will be presented with two means of importing documents:
- Drag-and-drop browsing from your local device
- Using a cloud-based service:
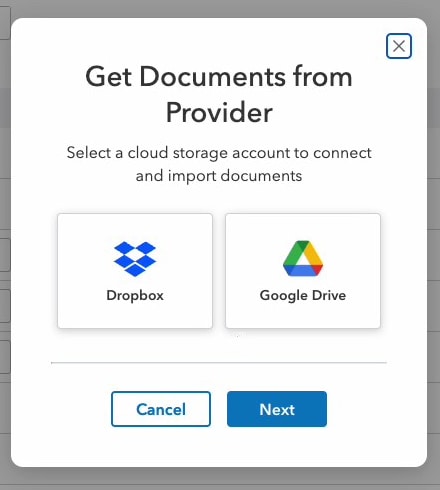
- In a secured pop-up, you will be asked to sign in to your Google or Dropbox account and grant the program access for the import task.
- The program will process the uploads and determine which documents can be imported.
- You can upload up to 20 documents at a time using Dropbox or Google Drive.
- Locate the document and click Import.
- A document viewer will appear where you can review the source document and the information to be imported.
- If you've already entered information for this document type in the return, you'll be asked whether you wish to replace the existing input or create a new record.
- Once you're satisfied, click Import.
After importing:
- Input fields completed by data import will be highlighted in green so you can identify them.
- A lightning bolt will appear next to the document in the data import panel, indicating that the import is complete.
How to flag items for review:
Flagged items are specific input fields marked as needing review. You can track missing data or estimated amounts by flagging the appropriate input fields.
- Go to the Input Return tab.
- Go to the input field you need to flag.
- Place your mouse over (or click inside of) the field. A flag button will appear to the right.
- Sometimes a more button will appear, which looks like three dots. Select more to see the Flag item option.
- Click the flag button or the Flag item option.
The flagged field will be highlighted in orange on your input screen, and the missing information added to a list of flagged items for the return.
To view and resolve previously flagged items:
- Select the flag button to the right, on the edge of your window.
- The button will have an orange badge showing the total number of items currently flagged in the return.
- A flagged items list will appear.
- Select the name of an item to jump to its input in the return, or select Resolve to show it's completed and remove the flag.
- Items can also be resolved on the input screen by simply clicking the flag button again.
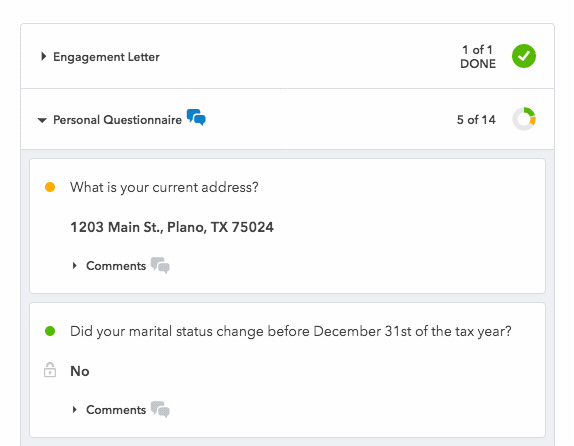
Adding and editing the Intuit Link organizer:
Import your client's source documents directly into the return using Intuit Link.
Adding or editing organizer requests
Once your client has accepted the Link invitation, you can:
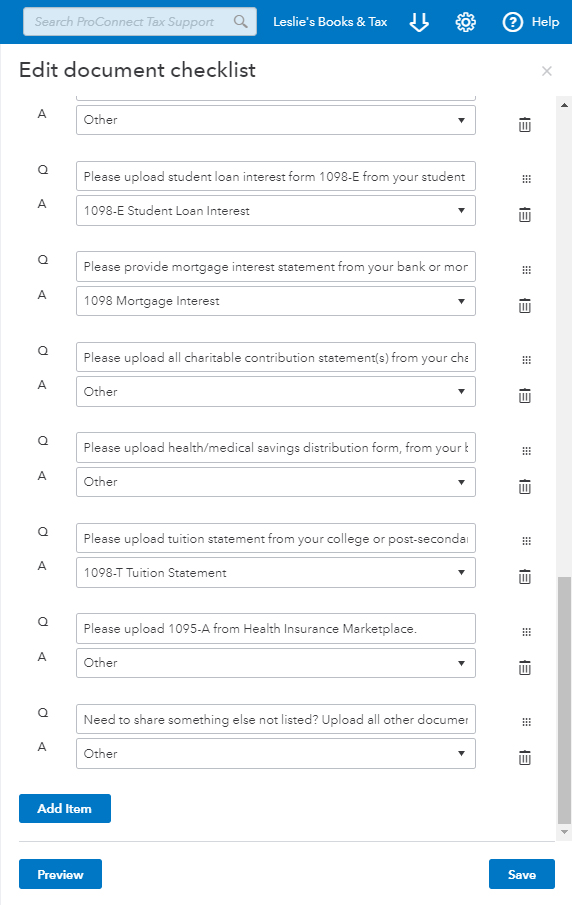
- Select Edit to customize the Engagement Letter, Questions, or Document checklist.
- Checking the Notify client box allows you to edit the email notification sent to your client when you save your changes.
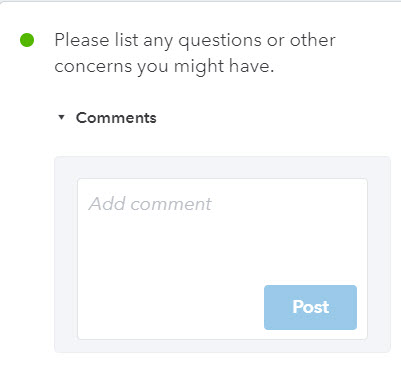
Adding comments to a request
Add comments or queries to your Link request using the Comments box.
Updating the request status
To update the request status, simply select the status from the status indicator dropdown.